Basic connections
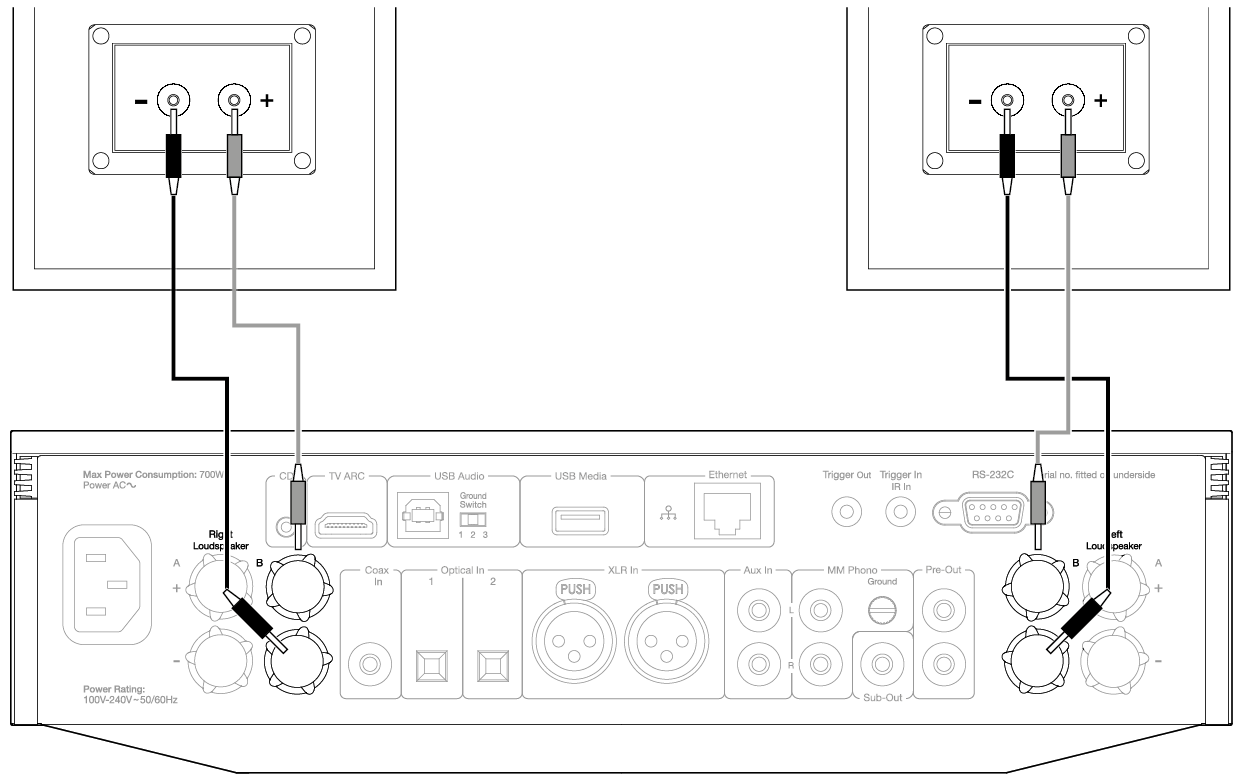
The diagram below shows the basic connection of your Evo to a pair of loudspeakers.

Speaker B connections (Evo 150 only)
The diagram below shows the connection for a second pair of loudspeakers. Pressing the speaker output icon will scroll through the selection of speakers, speaker A, speaker B, and speaker A and B together.
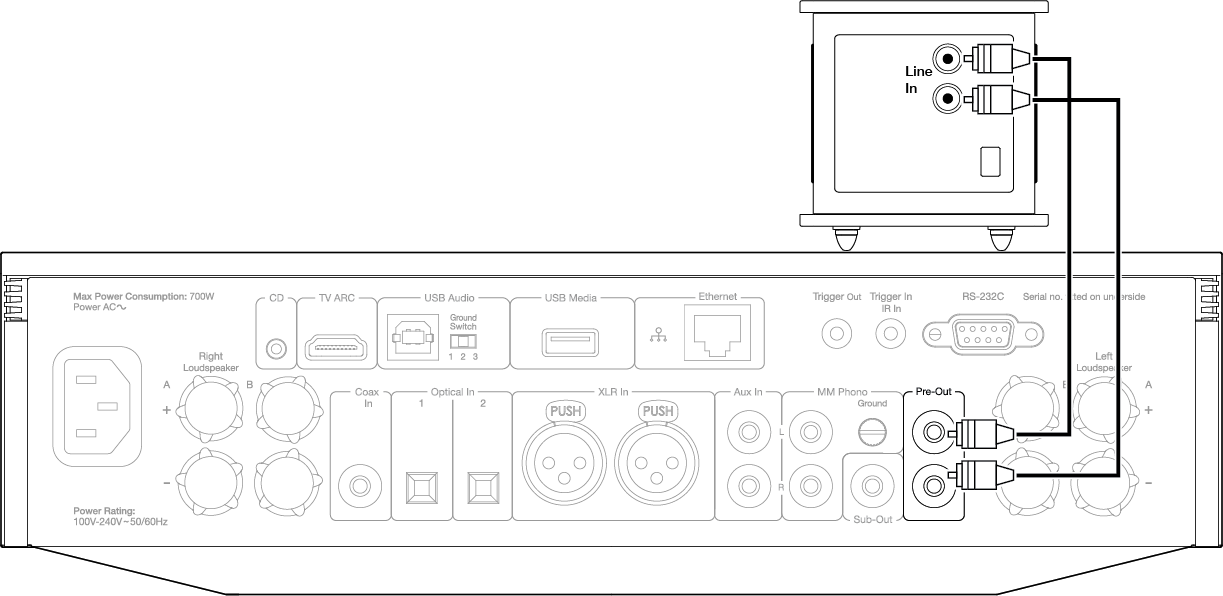
Preamp Out connections
The Preamp Out sockets are for connecting to a power amplifier or active subwoofer.
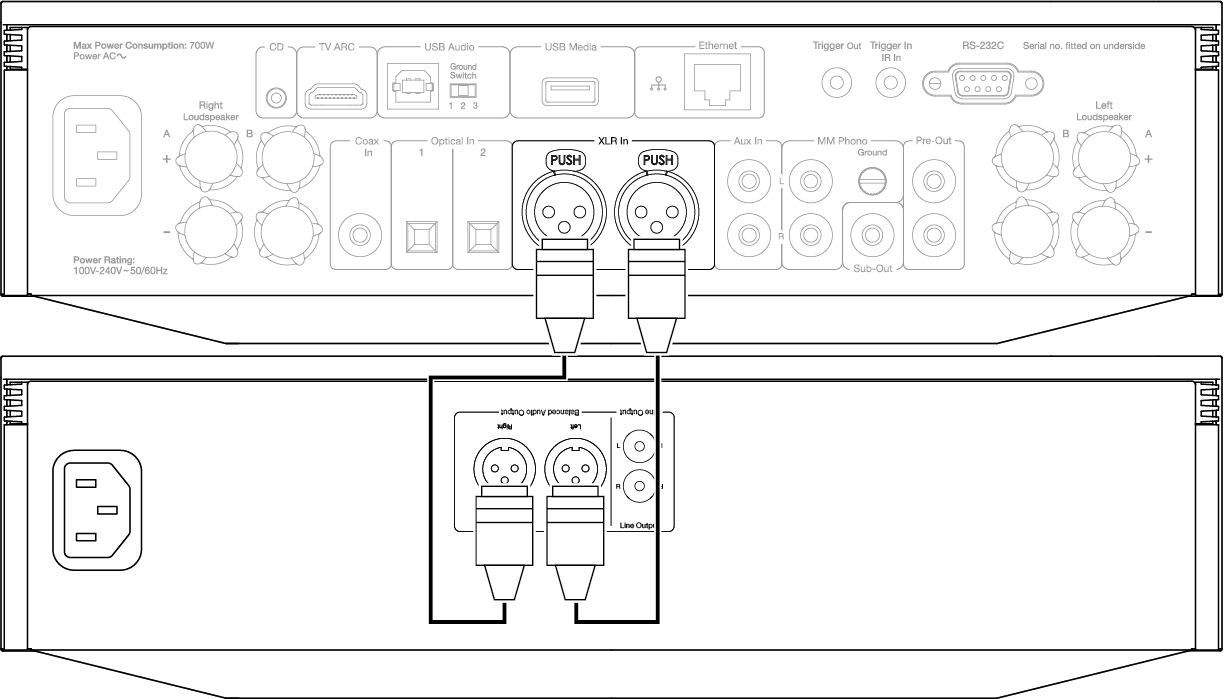
Balanced audio connections (Evo 150 only)
The diagram below shows how to connect the Evo 150 using the Balanced Audio inputs.
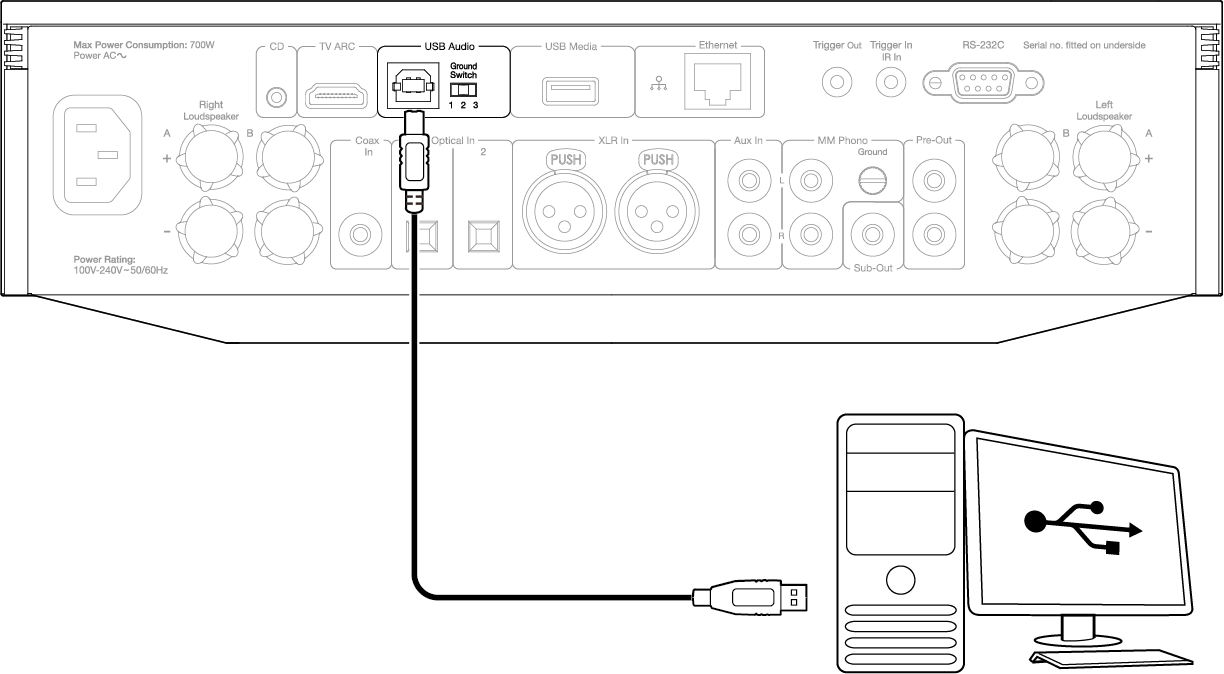
USB Audio connection (Evo 150 only)
Important note: Before setting up your Evo 150 for the first time, please make sure that the USB Audio connection is unplugged. USB Audio can be re-connected once any firmware updates are applied.
PC Setup
Note: Before connecting your PC to the EVO, ensure you install the required Cambridge Audio Windows 2.0 USB driver on your PC. Please find a link to the most recent USB Audio driver here.
1. Connect your EVO 150 to your PC.
- After installing the correct driver, using a USB Audio cable (Type A to Type B), connect the USB Audio In on your EVO 150 to a USB port on the PC.
2. Select the USB Audio source.
- This can be done using the source selector on the front of the EVO 150, or by going to the Home tab and then selecting USB Audio within the Sources section of the StreamMagic app.
3. Navigate to the CA Control Panel which should now be installed in your Windows taskbar. This will show any connected Cambridge Audio USB Audio device and current sample rate.
4. On your PC, navigate to Settings > System > Sound. Select the EVO 150 as your output device from the drop-down menu.
5. Within this same window under Related Settings on the right-hand side, select Sound Control Panel.
6. On the Playback tab, ensure that the EVO 150 is the default output device, then select Properties.
7. Within Speaker Properties, navigate to the Advanced tab. Select the desired bit depth and sample rate preference.
Note: This step is optional.
8. Your PC’s output will now playback via the EVO 150.
Mac Setup
Note: No extra drivers are required when using a Mac.
1. Connect your EVO 150 to your Mac.
- Using a USB Audio cable (Type A to Type B), connect the USB Audio In on your EVO to a USB port on the Mac.
Note: If using a Mac without a USB Type A port, you may also use USB Type C (Thunderbolt 3) to USB Type B connection.
2. Select the USB Audio source.
- This can be done using the source selector on the front of the EVO 150, or by going to the Home tab and then selecting USB Audio within the Sources section of the StreamMagic app.
3. Within the System Preferences of the Mac, locate the Sound settings. Select the EVO 150 as the output sound device.
4. On the Mac navigate to Applications > Utilities > Audio MIDI Setup. Select the EVO 150 as the output sound device on the left column, and then using the drop-down options select the desired bit depth and sample rate preference.
5. Your Mac’s output will now playback via the EVO 150.
Network connections
Important Note: It is vitally important that your EVO remains connected to an internet network as often as possible, either via Wi-Fi or Ethernet. This will ensure that the unit is regularly updated to meet essential security protocols, third party compatibility and the latest software requirements.
Failure to maintain your device with regular firmware updates as provided by Cambridge Audio will void the product warranty and is likely to cause major issues to the unit in time. Please ensure that your unit is updated to the most current firmware version. Information on the latest firmware version for the EVO can be found here.
Note: Where possible, avoid the use of powerline adapters, Wi-Fi signal boosters/extenders as these can disrupt the reliability of the network connection.
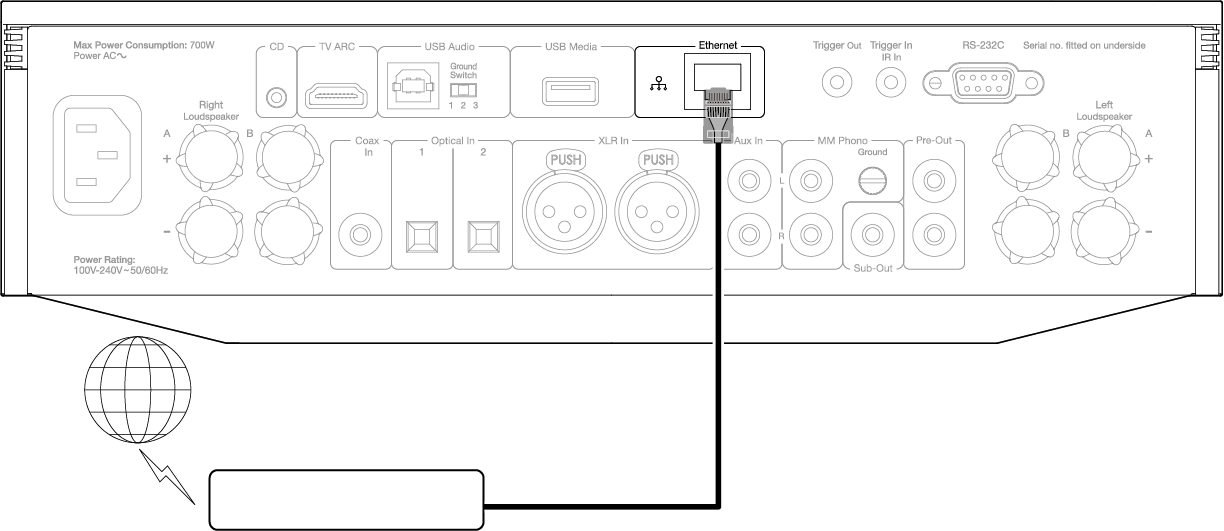
Connecting to a wired network
- Connect a network cable (Category 5/5E straight-through Ethernet cable) between the EVO and your router.
- Your EVO will now automatically connect to the network.
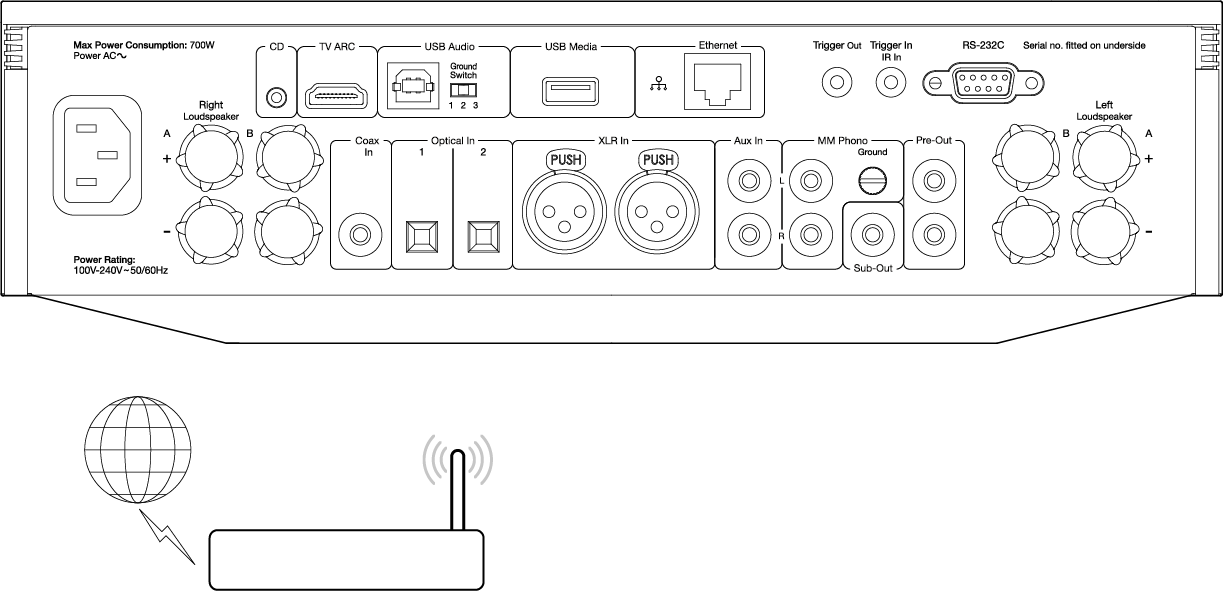
Connecting to a wireless network
iOS:
- Ensure that your EVO is in range of your wireless router, and then power on your unit.
- Go to the Wi-Fi settings on your iOS device and under ‘SETUP NEW AIRPLAY SPEAKER’ select 'EVO 75/100'.
- Once connected, to complete unit setup download and install the StreamMagic app from the Apple App store.
Android:
- Ensure that your EVO is in range of your wireless router, and then power on your unit.
- Download and install the StreamMagic app from the Google Play store.
- Open the StreamMagic app and select ‘Connect’.
- Under Choose a device select 'Set up a new device' and then select the Evo 75 or 150.
- Select ‘Wireless Connection’ and then 'Continue'.
- Your Android device will now show all available Wi-Fi devices in range. Select 'Setup:EVO 75/150'.
- Once connected, you will be prompted to enter your Wi-Fi network password. Enter the password and select 'Continue'.
- Your EVO will now connect to your Wi-Fi network, this may take up to a minute.
- Once connected, complete the initial setup of your unit within the StreamMagic app.
Note: Your Evo will need to be in range of your wireless router.