When designing our amplifiers, we include features that allow you to connect your system in various ways. The inclusion of features such as Pre-Out and Speaker B connections mean that you can flexibly configure your system depending on your requirements.
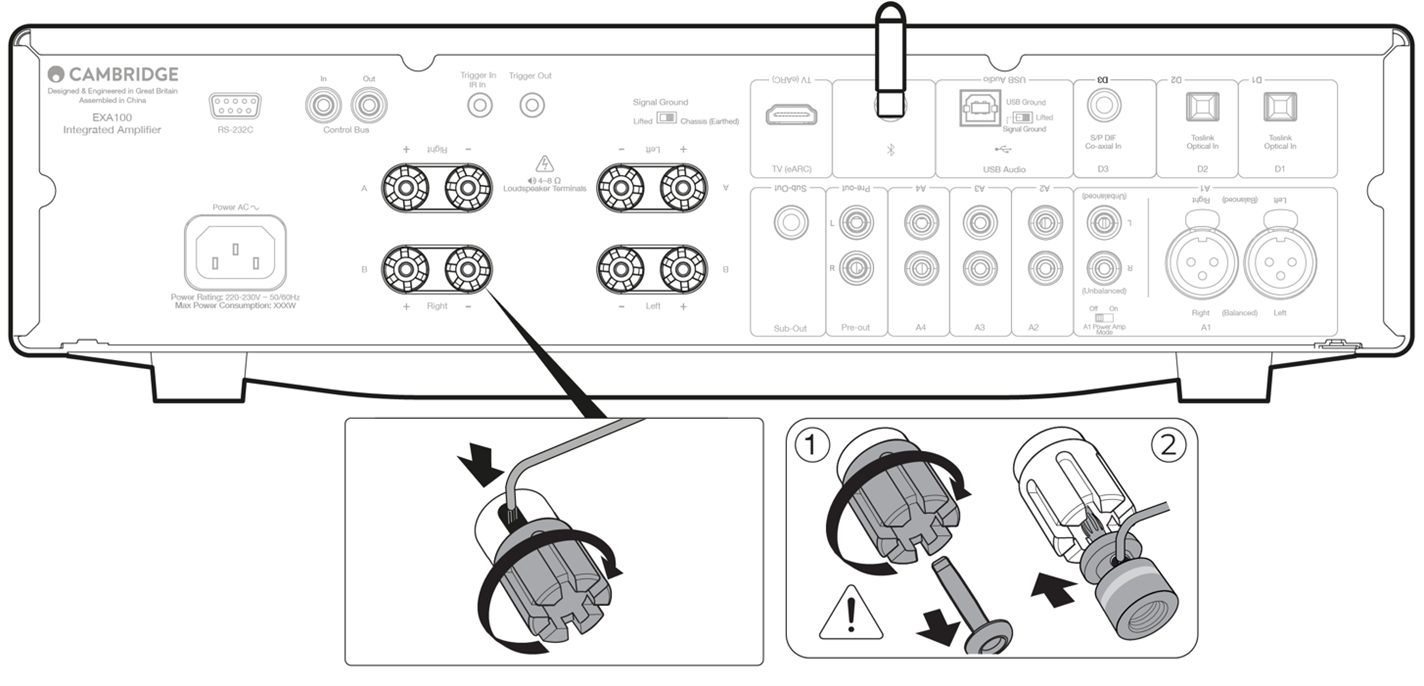
Note: When using a banana plug, make sure the speaker terminals are completely tightened before inserting the plug.
Note: The speaker terminals will need to have the round pips removed before you can insert a banana plug into them.
Tips: The easiest way to remove these is to slightly unscrew the speaker terminal and then do it back up again. This will raise the plug for easy removal.
Basic connections
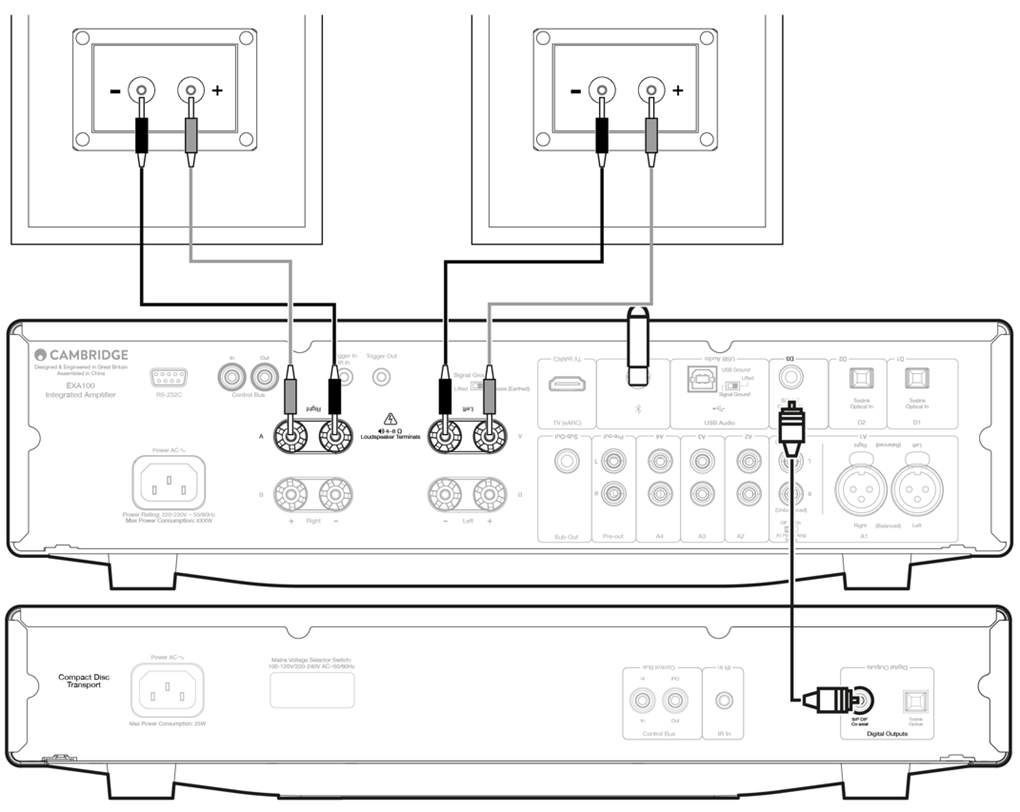
The diagram below shows the basic connection of your amplifier to a CD player using the D3 coaxial digital input source and a pair of loudspeakers.
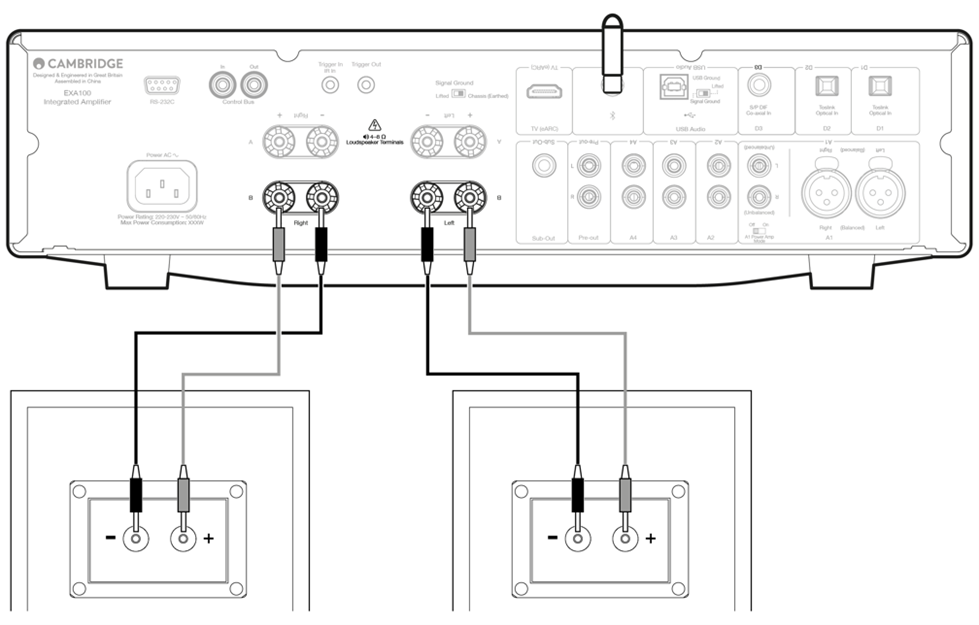
Speaker B connections
The Speaker B connections on the back of the amplifier allow for a second set of speakers to be used (i.e. speakers located in another room). The Speaker A/B button on the front panel scrolls through the selection of speaker A only, speaker B only, and speaker A and B together.
Sub out connections
The Sub Out is for connecting to the LFE/Sub input of an active subwoofer. The diagram below shows how to connect the amplifier to an active subwoofer via the LFE/Sub input on the subwoofer.

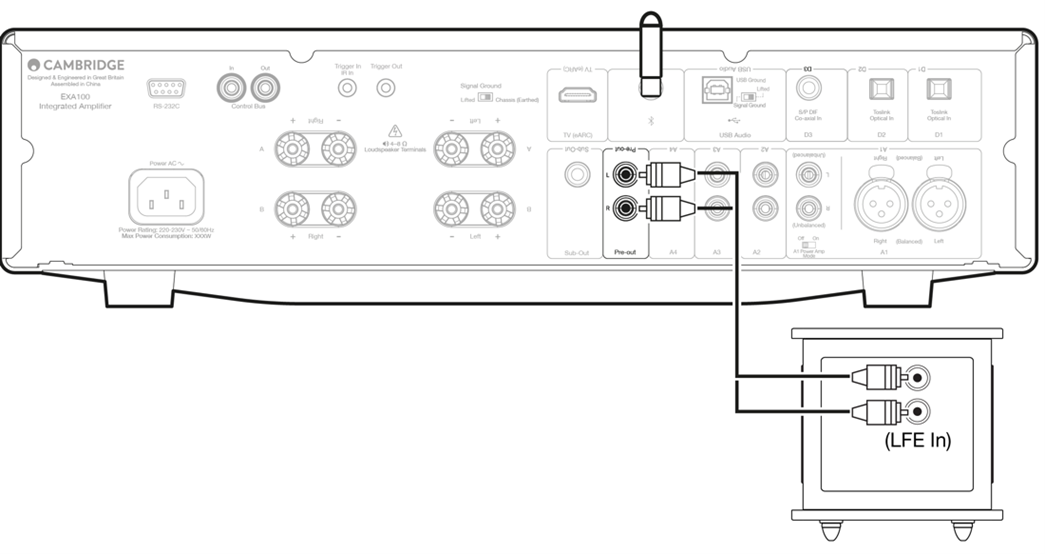
Preamp out connections
The Preamp Out sockets are for connecting to the input sockets of a power amplifier or active subwoofer. The diagram below shows how to connect the amplifier to an active subwoofer via the Line In inputs on the subwoofer.
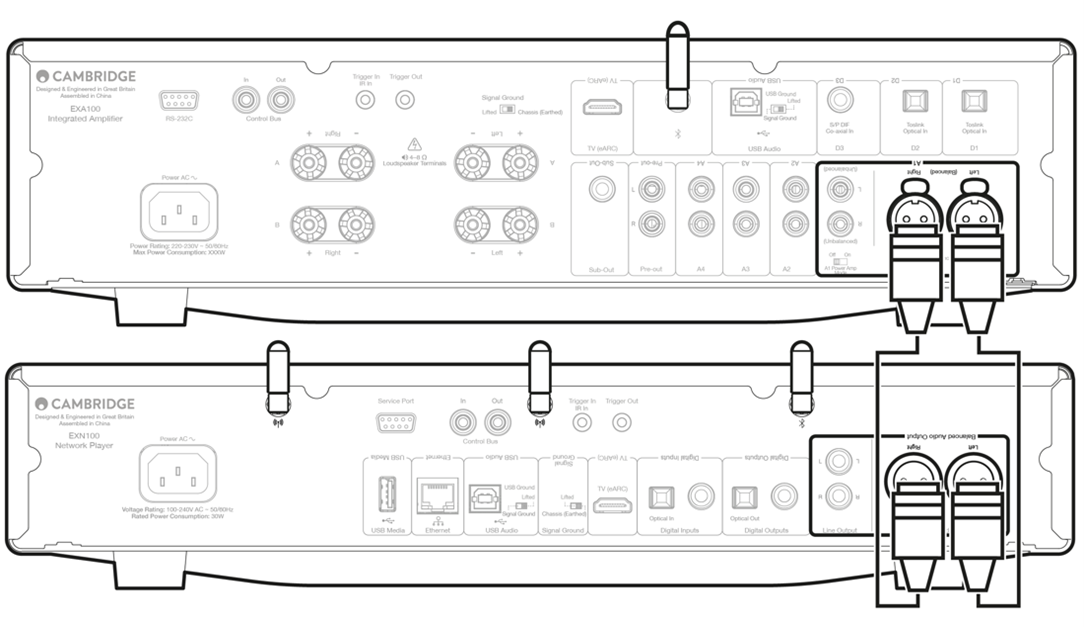
Balanced audio connections
The diagram below shows how to connect the EXA to the EXN Network player using the Balanced Audio inputs via three pin XLR connectors. The EXA can also be connected to non-Cambridge Audio sources with balanced outputs.
Balanced connections in an audio system are designed to reject electrical noise, from power wiring etc, and also the effects of noise currents flowing through ground connections. The basic principle of balanced interconnection is to get the signal you want by subtraction, using a three-wire connection. One signal wire (the hot or in-phase) carries the normal signal, while other (the cold or phase-inverted) carries an inverted version. The balanced input senses the difference between the two lines to give the wanted signal. Any noise voltages that appear identically on both lines (these are called common-mode signals) are cancelled by the subtraction.
The EXA is designed to work at its highest performance when a balanced interconnect is used.
Note: To select the balanced input on the EXA, press the A1 button twice on the front panel or on the remote control so that the A1 light on the front panel display lights up Orange. Repeatedly pressing the A1 button will toggle between balanced and unbalanced inputs.
Connecting a TV
A TV can be connected to one of the digital inputs on the EXA, as long as the TV has the required Optical or Coaxial output. Ensure that the output audio settings on the TV are set to PCM or Stereo, as the EXA is only able to decode a Stereo signal.
Please also ensure that the digital input that the TV is connected to has been selected on the front panel of the EXA (D1, D2 or D3).
Enabling ‘TV Mode’ within the EXA:
Some Connected TVs will send an inconsistent sample rate to the EXA, that the DAC inside the amplifier is unable to process. This can result in audio dropouts and glitches. If this is the case with your EXA, ‘TV Mode’ will need to be enabled within the amplifier.
To enable 'TV mode' on the EXA:
- Enter the Setup menu by putting the EXA in standby mode.
Whilst in Standby mode, press and hold the Speaker A/B button until the A/B lights flash alternatively and the sources A1-A4 light up
See below source buttons for setup configuration:
Note: Button selected (on) is represented by Blue light.
A2 off – The EXA is set to the best digital input audio setting on input D2.
A2 on – The EXA is set to a more tolerant digital input setting for input D2 that should reduce the chance of having the signal intermittently drop.- To save the setup settings and exit the setup menu, press the Speaker A/B button.
Note: Pressing the Standby/On button while in the setup menu will exit this setup menu and will not save the setup settings.
TV Input (ARC/eARC input)
The ARC/eARC function on a TV allows it to send audio and control commands to a connected audio product. This allows the TV to switch on the audio product when needed, and also to control the volume from the TV remote.
Note: the TV power Control option in the configuration menu is enabled by default but can be disabled if required.
Troubleshooting
No signal shown on the front panel or no audio output from your connected product
- Make sure the HDMI input on your TV supports ARC/eARC
- Make sure the TV is set to use a connected audio system rather than its internal speakers
- Make sure that the audio output of your TV is set to 'Stereo PCM (Uncompressed)'
- Make sure your HDMI cable is compatible with HDMI 1.4 or above
TV will not switch on or control your connected product
- Make sure any relevant CEC and ARC settings have been enabled on your TV
- Make sure TV Power Control mode has been enabled on the EXA. See the Setup Menu section for more details
Reporting an issue
If after following the above troubleshooting steps you still have a problem getting ARC/eARC to work with your product, please contact our support team