Why doesn’t my DacMagic 100 recognise the digital signal from my DVD player, or Sky Box, etc?
Our DACs will recognize and up-sample a two-channel PCM digital input signal.
You will need to make sure that the digital output from the DVD player (or another source component) is set to output two-channel PCM, rather than other signals such as bitstream, Dolby Digital, DTS or multi-channel, etc.
How do I install the latest USB audio driver for the DacMagic 100?
To install the latest USB Audio driver for your DacMagic 100, please follow the following steps:
- Download the correct driver for your Windows operating system from https://www.cambridgeaudio.com/gbr/en/driver-updates
- Unzip the downloaded folder, and double click on the application file to run the installer.
- Run the installer and follow the on-screen instructions.
- Allow the installation to progress, click next, and then finish to complete the installation.
- Confirm the installation by opening the CA Control Panel and checking the driver version.
Can the DacMagic 100 decode/playback MQA content?
Master Quality Authenticated is an audio codec using a sophisticated compression algorithm, and a form of file authentication intended for high-quality audio streaming and file download. This allows the listener to receive digital audio at the original studio quality.
The DacMagic 100 does not support MQA as it lacks the required MQA decoder. However, Cambridge Audio does offer a range of MQA certified devices such as the DacMagic 200M, EVO 75, and EVO 150.
How do I select the correct speaker properties on my PC/Mac to ensure I am receiving Hi-Res audio?
To ensure that the DacMagic 100 is receiving Hi-Res audio, you may need to adjust some of the sound settings on your PC or Mac.
To adjust the settings on PC
1. With the DacMagic 100 connected, use your PC’s search function to locate ‘Sound Settings’. This will open a user interface such as below:
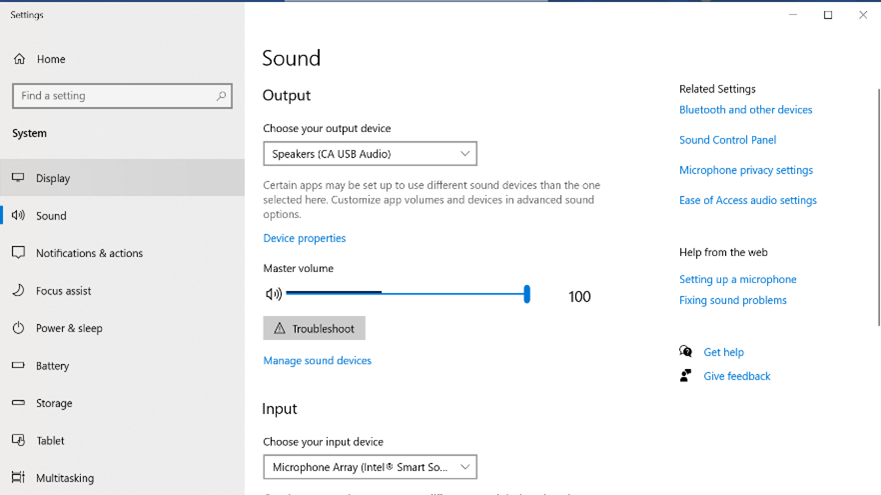
2. Select ‘CA USB Audio’ as your output device.
3. Open the Sound Control Panel.

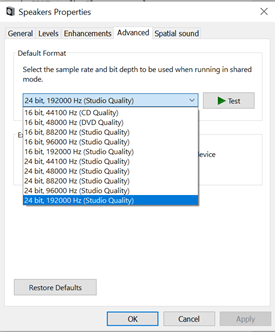
4. Highlight the device named ‘CA USB Audio’, then click ‘Properties’.
5. In the advanced tab you will be given the option to change the Windows output sample rate. If you are using your DacMagic 100 in USB Audio Class 1.0 mode, set this to ‘24-bit, 96000Hz’.
6. If you have the Cambridge Audio USB 2.0 Driver downloaded, and are using the DacMagic in USB Audio Class 2.0 mode, set the output sample rate to ’24-bit, 192000Hz’.
7. Apply these settings, and click OK
To adjust settings on Mac
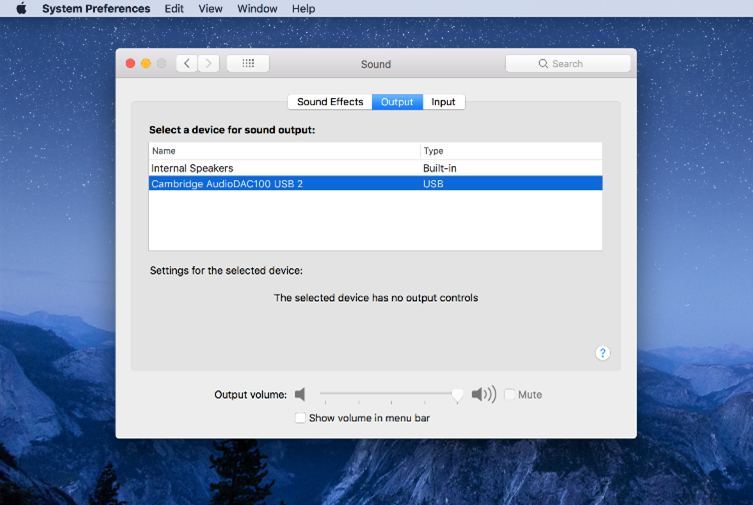
1. With the DacMagic 100 connected to your Mac, open the ‘System Preferences’, and navigate to ‘Sound’.
2. In the ‘Sound’ interface, select the DacMagic 100 as the selected sound output device.
3. Next, open ‘Finder’ and navigate to ‘Applications. Then open the folder named ‘Utilities’.
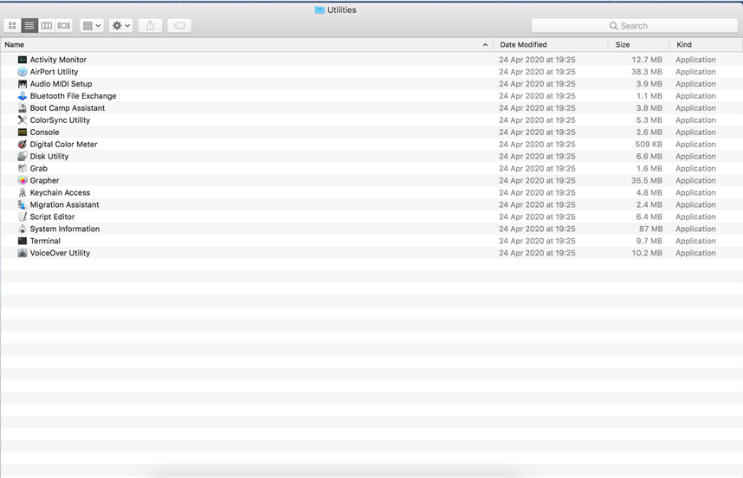
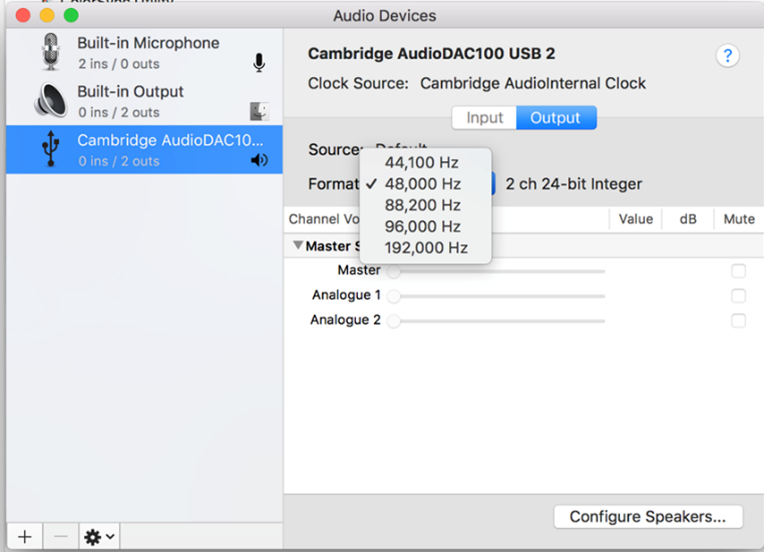
4. Within the utilities folder, open ‘Audio MIDI setup’. In here select the DacMagic 100, and you will be given the option to modify the output sample rate.
5. If your DacMagic is operating in USB Audio Class 1.0 mode, set the output sample rate to 96,000Hz.
6. If your DacMagic 100 is operating in USB Audio Class 2.0 mode, set the output sample rate to 192,000Hz.
