
1. DIGITAL INPUTS - TOSLINK and S/P DIF co-axial digital inputs.
Note: To obtain the best results from your system we recommend using only high quality Cambridge Audio interconnects. This will ensure that you hear your system as we designed it. Please ask you dealer for details.
2. AUDIO INPUTS - These inputs are suitable for any ‘line level’ source equipment such as the audio outputs of CD players, BD/DVD players, etc.
3. PHONO INPUT - This input has a built-in phono stage.
Record players fitted with Phono Cartridges of the Moving Magnet (MM) or high output Moving Coil (MC) type (between 2-6mV output and 30-50k Ohm load impedance) can be used.
Low output Moving Coil types (<1mV and usually 10-1000 Ohm load impedance) cannot be directly connected and will require a matching transformer or Phono pre-amp.
Note: The ‘ground’ terminals on both the record player and the AXR100D should be connected (where possible) with a ground wire for lowest noise/hum pickup.
Due to stray magnetic fields, turntables should not be located in close proximity due to possible interference.
4. REC OUT - Connect to the recording input of a tape deck, CD recorder input, etc.
This output provides a constant high level output that does not fluctuate with the volume of the main unit. For this reason, the AXR100D cannot be used as a Preamplifier only and the Rec Out can’t be connected to a Subwoofer.
5. SUB-OUT - Connection to the input socket of an active subwoofer.
Note: There is a 2nd order low pass filter of 200Hz applied to the Sub Out, which will filter out frequencies above 200Hz.
The frequency of the connected speakers is not adjusted when the Sub Out is in use, they will still be sent the full frequency range.
6. DAB/FM ANTENNA - Tuner aerial connections for picking up radio signals. Refer to the ‘Connections’ section of this manual.
For permanent use, outdoor DAB/FM aerials are highly recommended.
7. SERVICE PORT - For servicing use only. Do not connect anything here as it may result in damage to the unit.
8. BLUETOOTH ANTENNA - Used for wireless streaming Bluetooth (A2DP/AVRCP) audio capability directly from most phones, tablets and laptops. Refer to the operating instructions section of this manual
9. LOUDSPEAKER TERMINALS
Note: When using a banana plug, make sure the speaker terminals are completely tightened before inserting the plug.
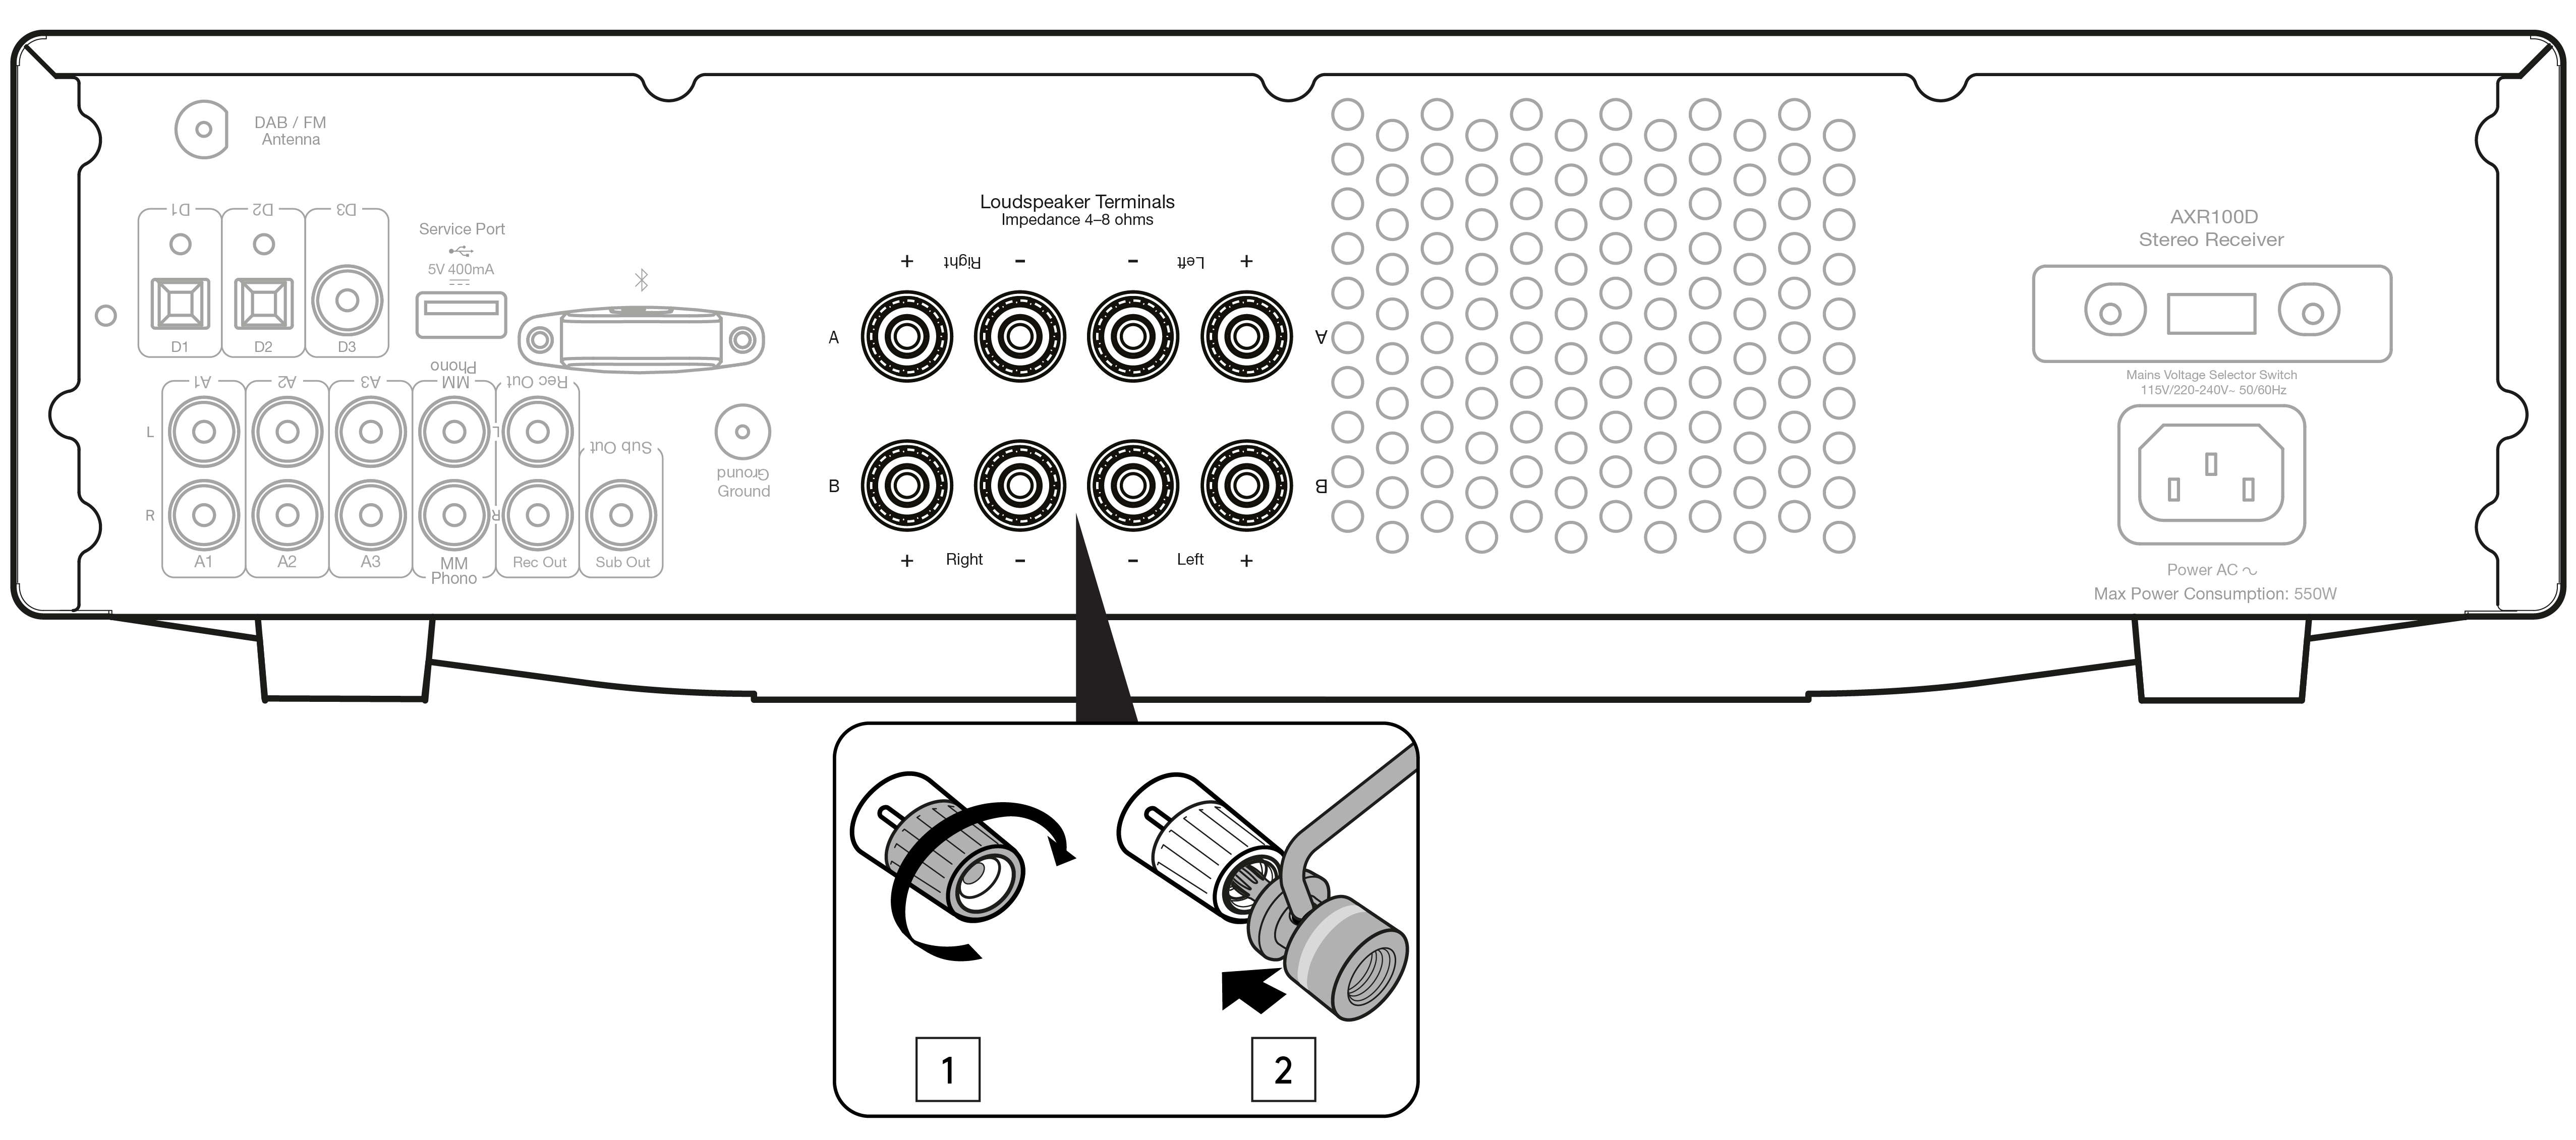
Two sets of loudspeaker terminals are available:
- A (main loudspeaker terminals, top row)
and
- B (secondary switchable loudspeaker terminals, bottom row).
Connect the wires from your left channel loudspeaker to the Left positive and negative terminals, and the wires from the right channel loudspeaker to the Right positive and negative terminals.
In each case, the red terminal is the positive output and the black terminal is the negative output.
Care should be taken to ensure no stray strands of wire are shorting speaker outputs together. Please ensure that the loudspeaker terminals have been tightened adequately to provide a good electrical connection. It is possible for the sound quality to be affected if the screw terminals are loose.
The use of A and B speakers affords you an easy and inexpensive way to create a simple multi-room system.
Note: The speaker terminals will need to have the round dust caps removed before you can insert a banana plug into them.
Note: When using two pairs of speakers, use speakers with a nominal impedance of 8 ohms.
10. HEAT TUNNEL VENT GRILLE - Allows cooling of internal circuitry via the heat tunnel. DO NOT OBSTRUCT.
11. VOLTAGE SELECT SWITCH - For servicing use only.
12. AC POWER SOCKET - Once all connections are complete, plug the AC power cable into an appropriate mains socket and turn the unit on. Please only use the power lead supplied with the unit.