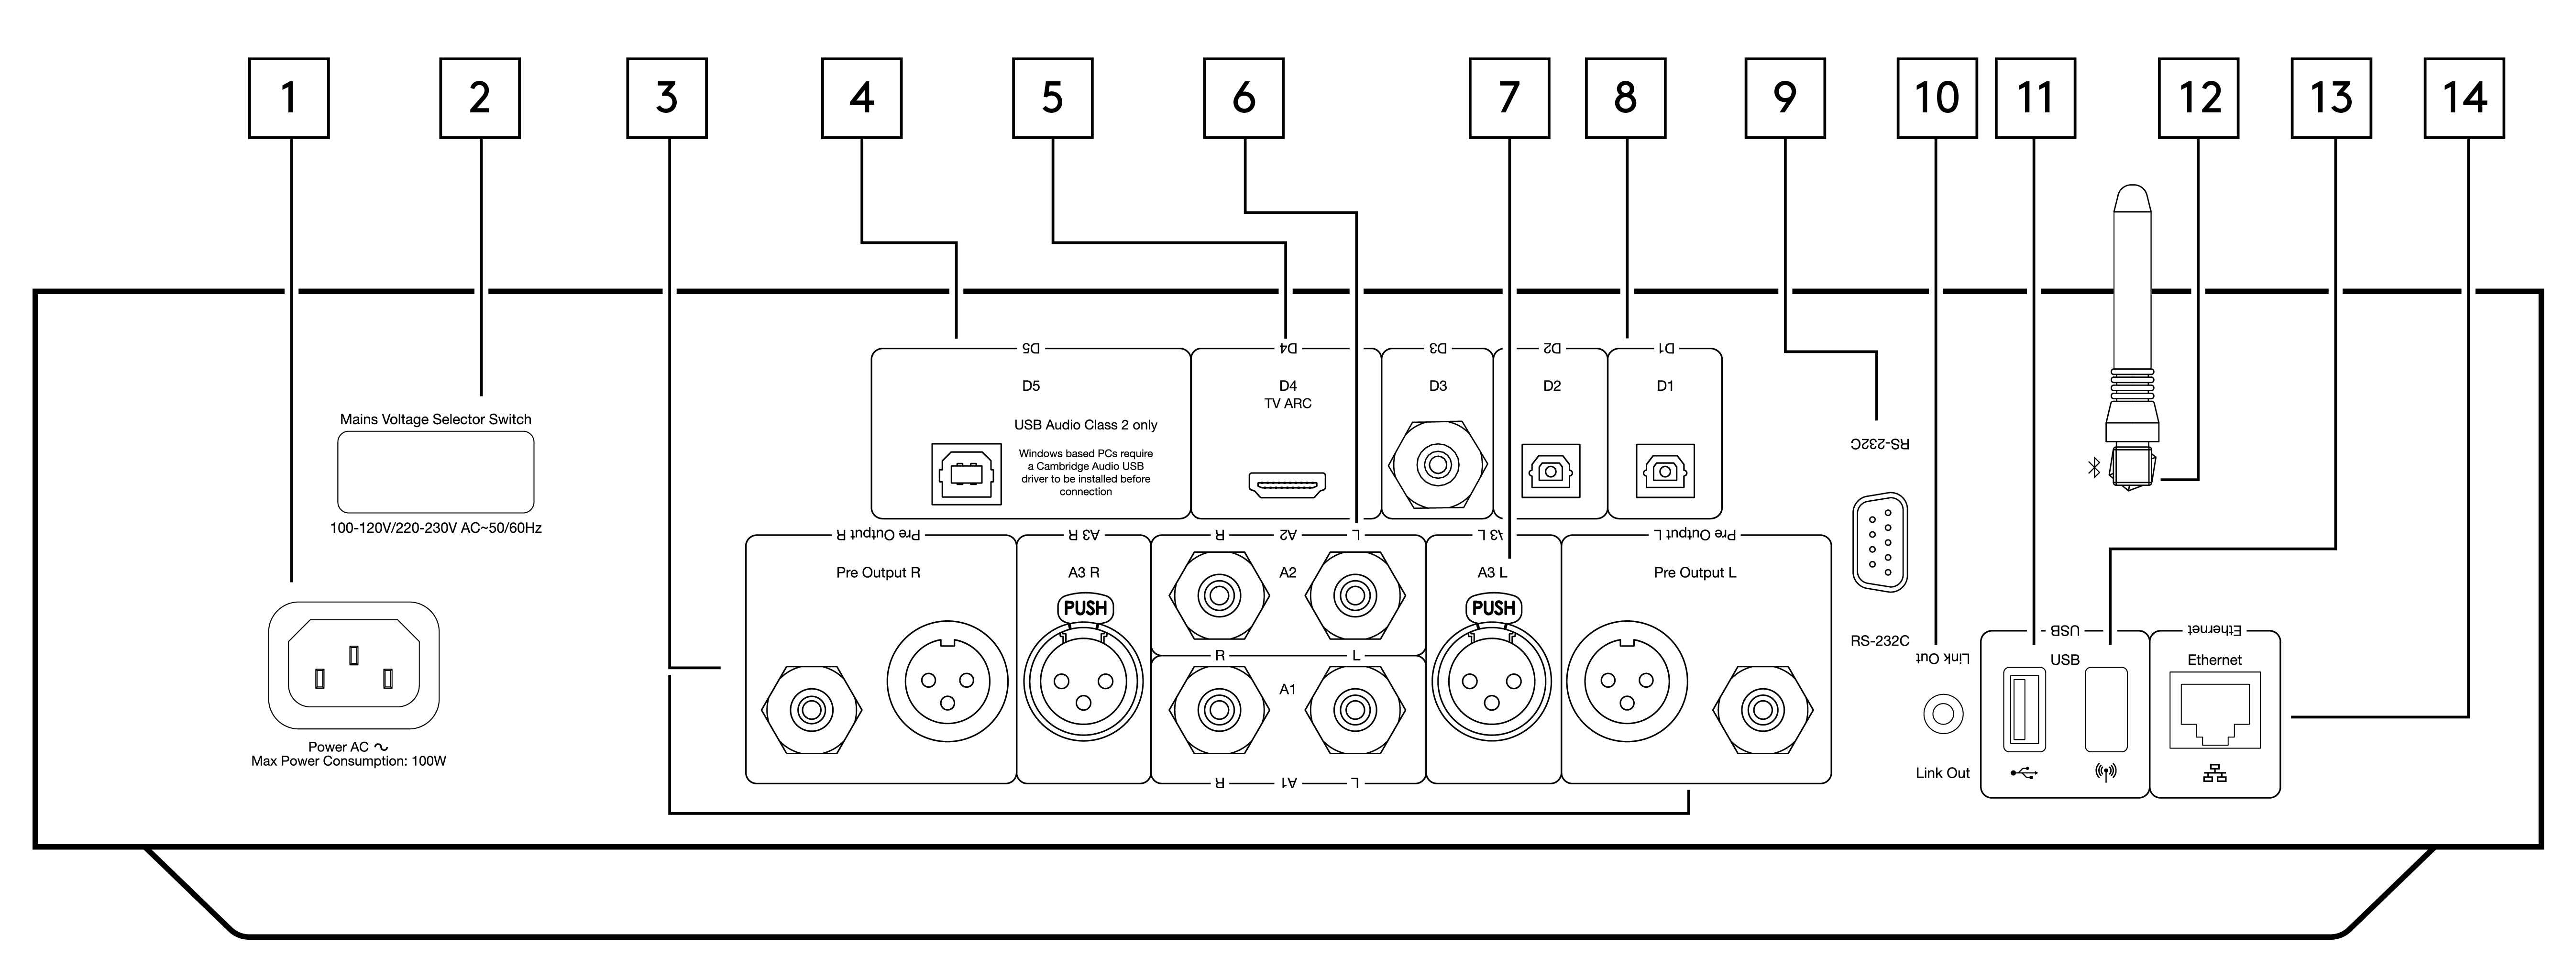
1. AC Power Socket
Once you have completed all connections to the amplifier, plug the AC power cable into an appropriate mains socket then switch on.
2. Voltage Selector Switch
Note: For use by Cambridge Audio service personnel only.
3. Pre Output (R and L)
Line Output (fixed or variable) used to provide a signal to another amplifier or a recording device.
4. USB Audio In (D5)
A USB B type socket to enable the playback of audio from a computer running either Microsoft Windows or Apple Mac OS X operating systems. Some builds of Linux are also suitable.
Note: Class 2 USB Audio only. Windows based PC’s require a Cambridge Audio USB driver to be installed before connection.
5. Audio Return Channel (ARC) (D4)
For connection from a TV that supports ARC function.
6. Unbalanced RCA (A1 and A2 – L and R)
For use with unbalanced RCA connections.
7. Balanced XLR (A3 – L and R)
For use with balanced XLR connections. The balanced connection is the higher quality option and can reject noise and interference in the cable when used with other equipment that supports this function.
8. Digital Inputs (D1, D2 and D3)
TOSLINK (x2) and S/P DIF co-axial digital inputs.
Coaxial – Use a high quality 75 ohm digital RCA Phono interconnect cable (not one designed for normal audio use). This input is suitable for 16-24 bit content up to 192kHz.
TOSLINK Optical – Use a high quality TOSLINK fibre optic interconnect cable designed specifically for audio use. This input is suitable for 16-24 bit content up to 96kHz (TOSLINK is not recommended at 192kHz sampling rates).
9. RS232
Note: For use by Cambridge Audio service personnel only.
10. Edge Link
Jack sockets used to send and receive power and volume commands from other connected Edge Series products. For more information on the Edge Link, see Link section.
11. USB Media
For use with local media storage.
12. Bluetooth Antenna
Used for wireless streaming Bluetooth audio directly from most phones, tablets and laptops. For more information on the Bluetooth, see Bluetooth section.
13. USB Wi-Fi
Connect the supplied Wi-Fi dongle to the correct USB input on the rear of Edge NQ – it will need to be within range of your wireless router.
Important Note: Do not connect/disconnect the Wi-Fi dongle when the unit is on.
14. Ethernet
Use to connect the Edge NQ directly to a Wi-Fi router.