The USB Audio Input on your player is designed for use with PC and Mac computers. When connected, you will be able to playback music to the network player directly from the computer’s apps, software or media players.
Note: If using USB Class 1.0, you will be able to playback at a maximum of 24bit / 96kHz. If using USB Class 2.0, you will be able to playback at a maximum of 24bit / 192kHz.
PC Setup
Note: Before connecting your PC to the CXN (V2), ensure you install the required Cambridge Audio Windows 2.0 USB driver on your PC. Please find a link to the most recent USB audio driver here.
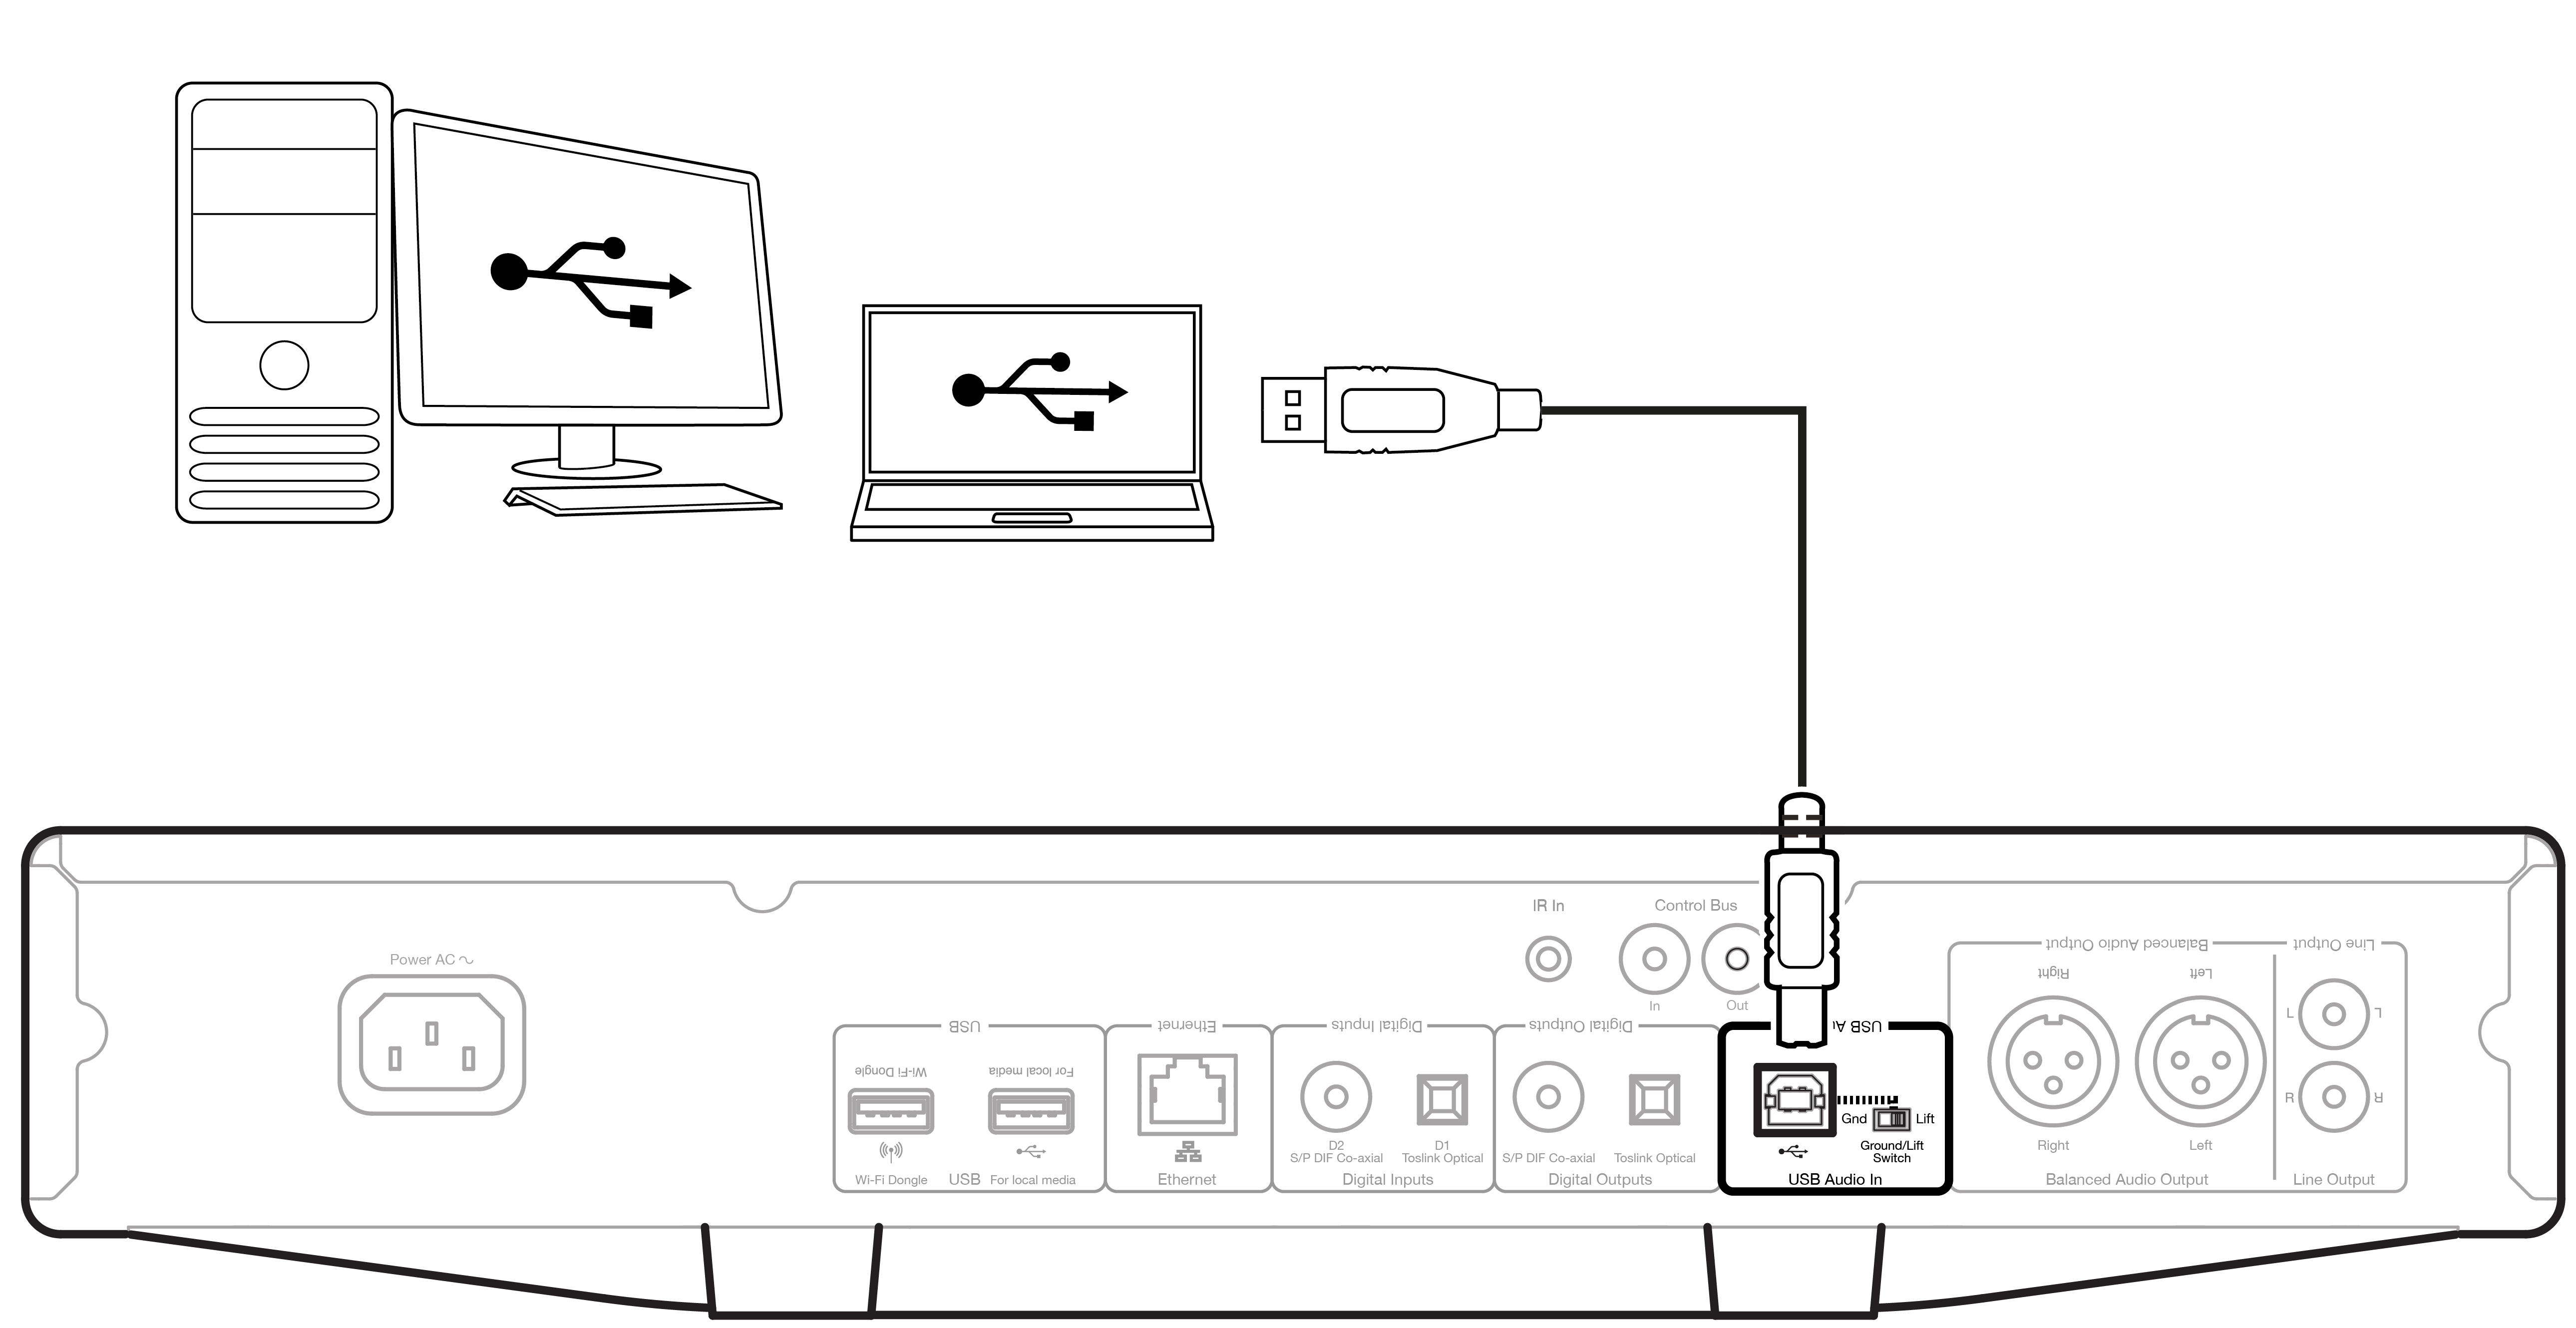
1. Connect your CXN (V2) to your PC.
- After installing the correct driver, using a USB audio cable (Type A to Type B), connect the USB Audio In on your CXN (V2) to a USB port on the PC.
2. Select the USB Audio source.
- If using the front panel controls of your CXN (V2), navigate to Home > Inputs > USB Audio.
- If using the StreamMagic app, go to the Home tab, then select USB Audio within the Sources section.
3. Switch the USB Class.
- If using the front panel controls of your CXN (V2), navigate to Home > Settings > Audio > USB Audio Class > Then toggle between USB Audio Class 1.0 or 2.0.
- If using the StreamMagic app, go to the Home tab, locate the CXN (V2) Settings > USB Audio Class > Then toggle between USB Audio Class 1.0 or 2.0.
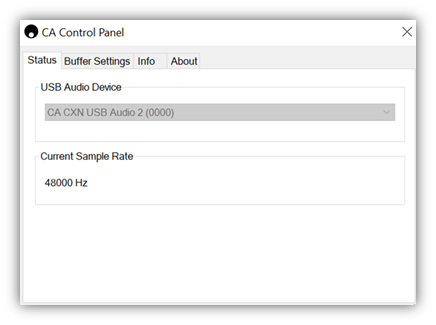
4. Navigate to the CA Control Panel which should now be installed in your Windows taskbar. This will show any connected Cambridge Audio USB Audio device and current sample rate.
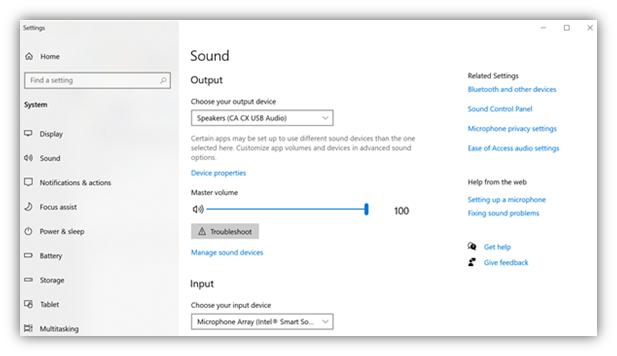
4. On your PC, navigate to Settings > System > Sound. Select the CXN (V2) as your output device from the drop-down menu. This will appear as 'CA CX USB Audio'.
5. Within this same window under Related Settings on the right-hand side, select Sound Control Panel.
6. On the Playback tab, ensure that CA CX USB Audio is the default output device, then select Properties.
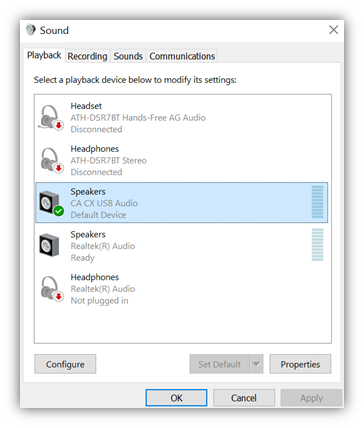
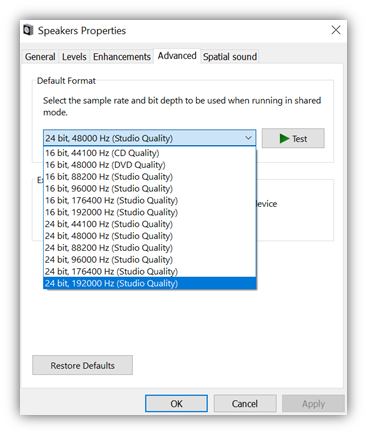
7. Within Speaker Properties, navigate to the Advanced tab. Select the desired bit depth and sample rate preference. Once selected, select Apply, then OK.
8. Your PC’s output will now playback via the CXN (V2).
Mac Setup
1. Connect your CXN (V2) to your Mac.
- Using a USB audio cable (Type A to Type B), connect the USB Audio In on your CXN (V2) to a USB port on the Mac.
Note: If using a Mac without a USB Type A port, you may also use USB Type C (Thunderbolt 3) to USB Type B connection.
2. Select the USB Audio source.
- If using the front panel controls of your CXN (V2), navigate to Home > Inputs > USB Audio.
- If using the StreamMagic app, go to the Home tab, then select USB Audio within the Sources section.
3. Switch the USB Class.
- If using the front panel controls of your CXN (V2), navigate to Home > Settings > Audio > USB Audio Class > Then toggle between USB Audio Class 1.0 or 2.0.
- If using the StreamMagic app, go to the Home tab, locate the CXN (V2) Settings > USB Audio Class > Then toggle between USB Audio Class 1.0 or 2.0.
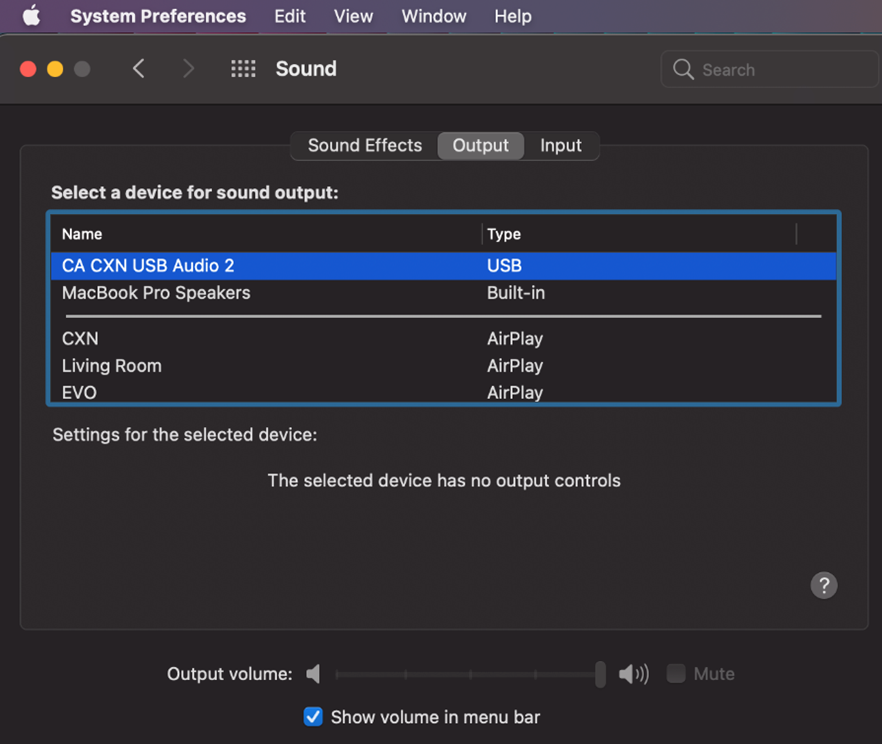
4. Within the System Preferences of the Mac, locate the Sound settings. Select the CA CXN Audio Class 1 / 2 as the output sound device.
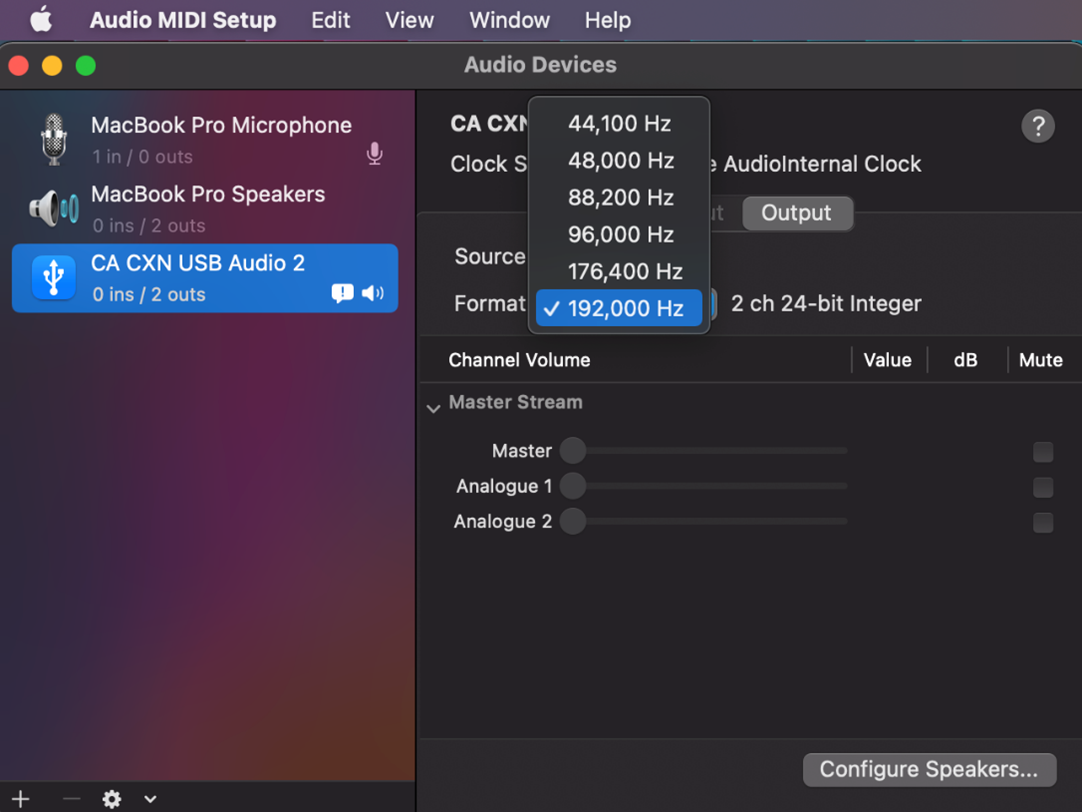
5. On the Mac navigate to Applications > Utilities > Audio MIDI Setup. Select the CA CXN Audio Class 1 / 2 as the output sound device on the left column, and then using the drop-down options select the desired bit depth and sample rate preference.
6. Your Mac’s output will now playback via the CXN (V2).