Important Note: It is vitally important that your CXN (V2) remains connected to an internet network as often as possible, either via Wi-Fi or Ethernet. This will ensure that the unit is regularly updated to meet essential security protocols, third party compatibility and the latest software requirements. This will ensure that the unit is regularly updated to meet essential security protocols, third party compatibility and the latest software requirements.
Failure to maintain your device with regular firmware updates as provided by Cambridge Audio will void the product warranty and is likely to cause major issues to the unit in time. Please ensure that your unit is updated to the most current firmware version. Information on the latest firmware version for the CXN (V2) can be found here.
Note: The CXN (V2) is not compatible with captive portal networks. The CXN (V2) can only on 2.4GHz WiFi. Where possible, avoid the use of powerline adapters, Wi-Fi signal boosters/extenders as these can disrupt the reliability of the network connection.
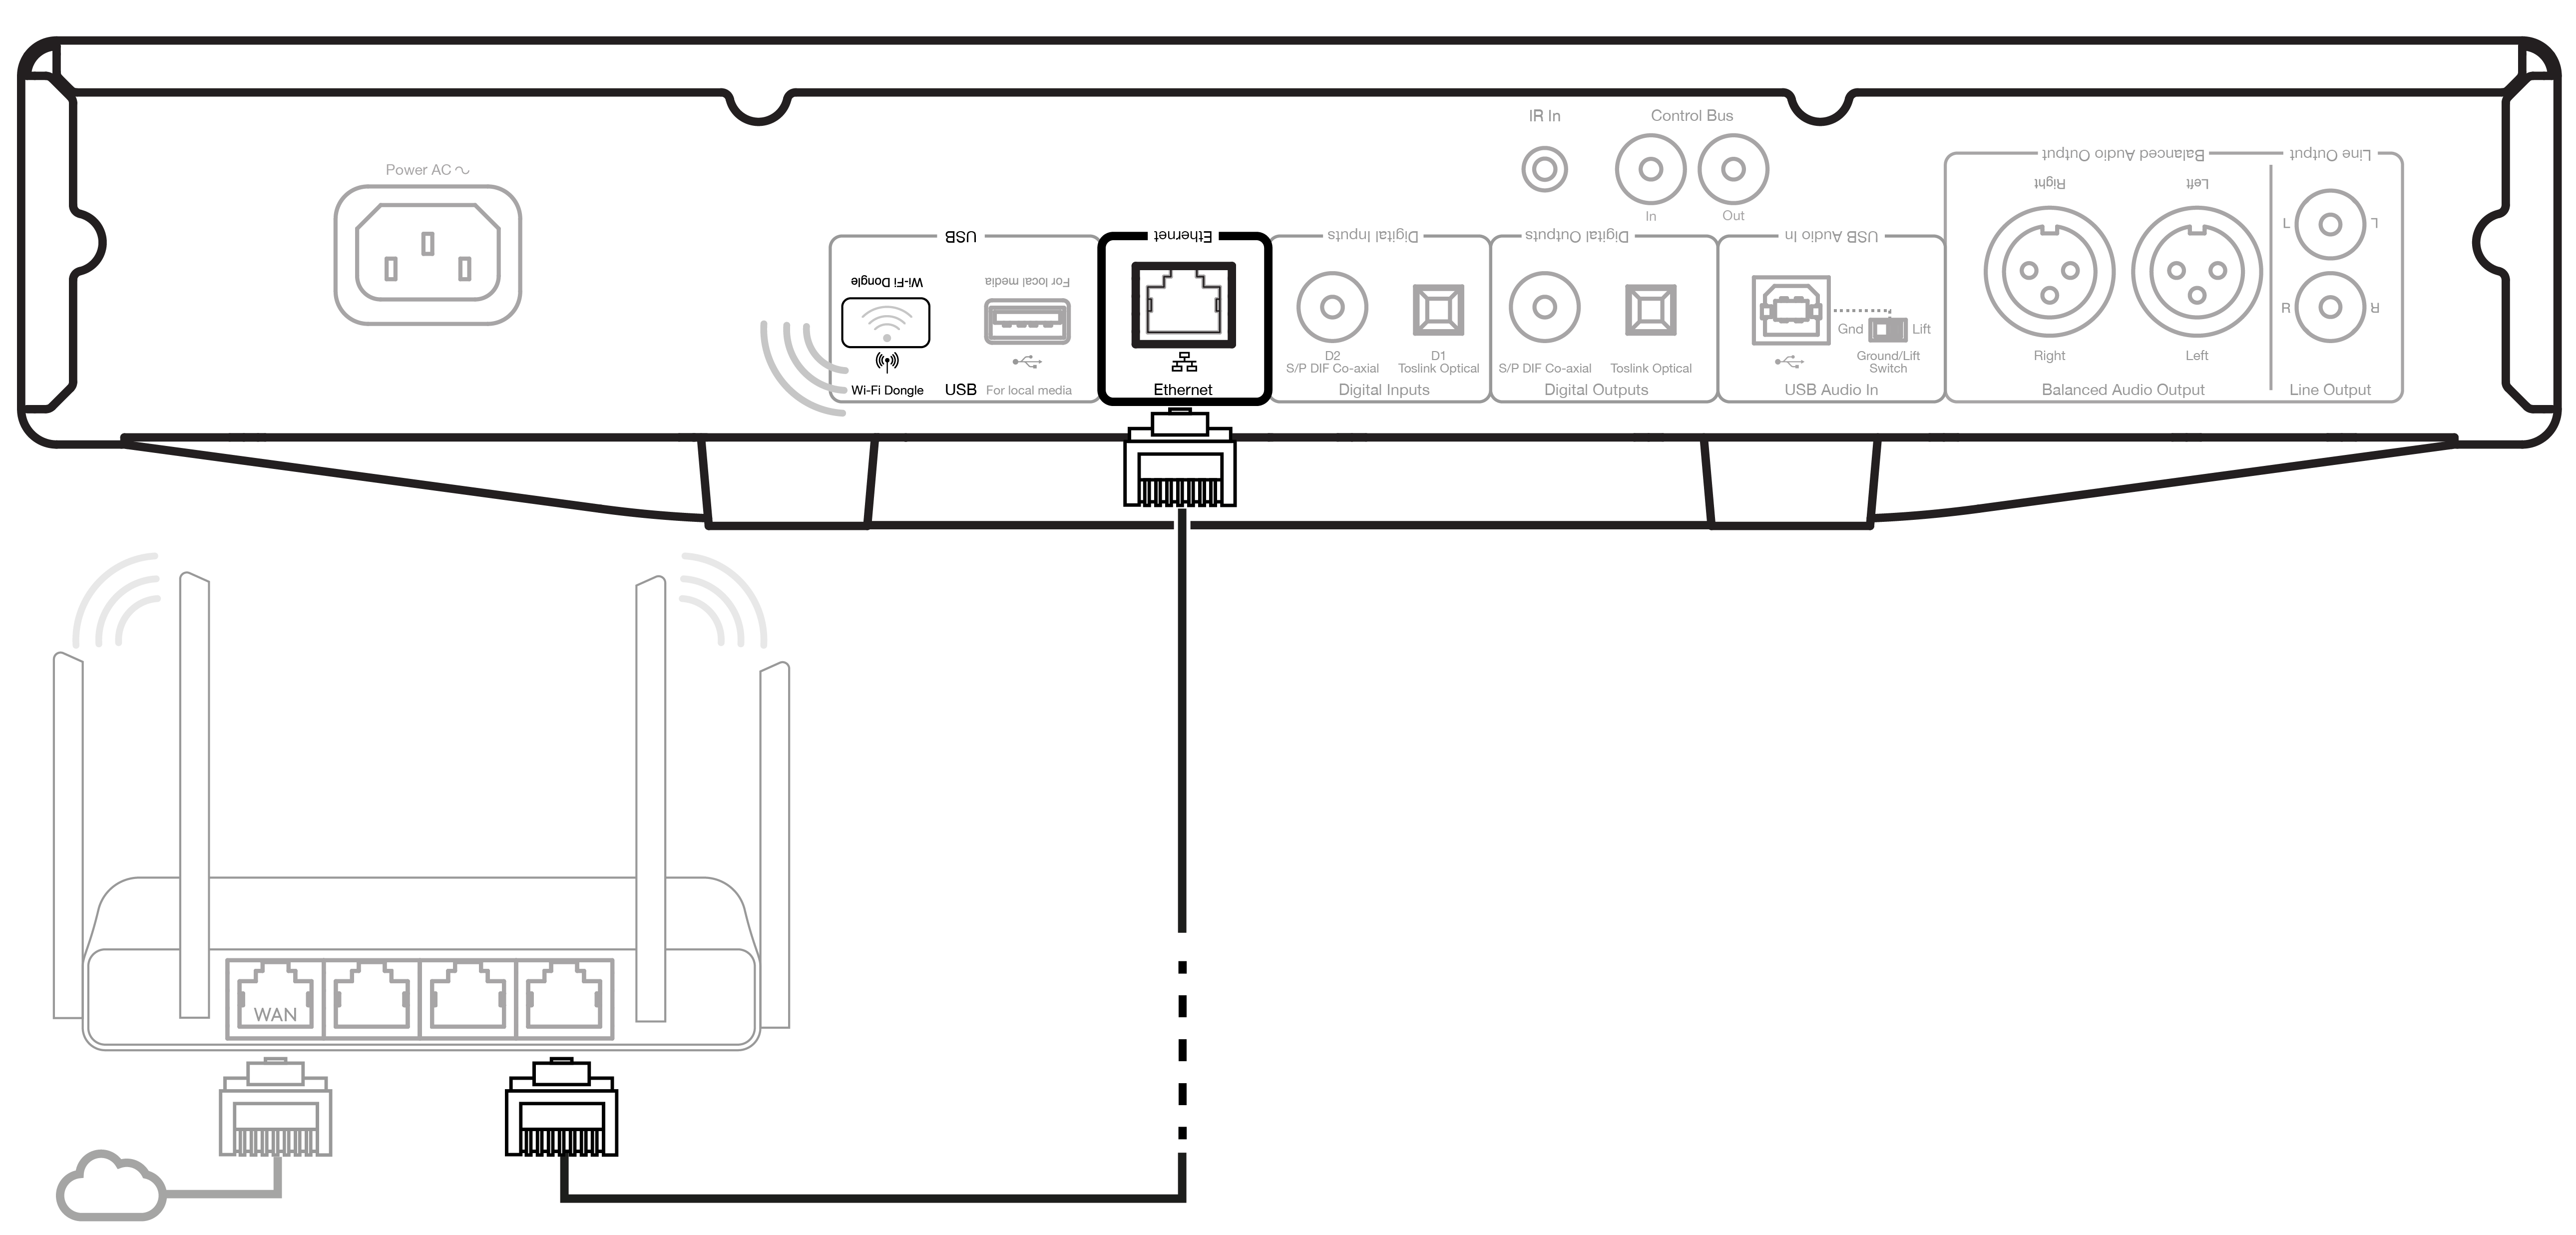
Connecting to a Wired Network
1. Connect a network cable (Category 5/5E straight-through Ethernet cable) between the CXN (V2) and your router.
2. Your CXN (V2) will now automatically connect to the network.

Connecting to a Wireless Network
Important note: Do not plug/unplug the wireless dongle when the unit is on.
1. Ensure that your CXN (V2) is in range of your wireless router, and then power on your unit.
2. On an iOS device go to Wi-Fi settings and under ‘SETUP NEW AIRPLAY SPEAKER’ select 'CXN v2'. Alternatively (or if using Android), when prompted on the front panel display connect the CXN (V2) to the Wi-Fi network of your choice. Select your Wi-Fi network from the list and then enter your password.
3. Once connected, to complete unit setup download and install the StreamMagic app either from the Apple App store or Google Play store.
Note: Wi-Fi network passwords are case sensitive.
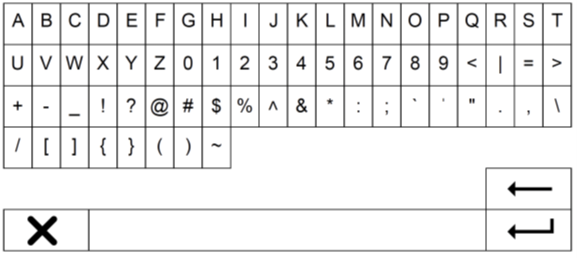
Character entry
This is typically for:
- Entering Wi-Fi network password.
- Searching for radio stations and content on UPnP servers.
- Customising the CXN (V2) name and digital input names.

To enter text:
1. Use the front panel rotary encoder to scroll through each symbol.
2. Using the IR remote control, you can navigate horizontally and vertically.
3. Press Enter on the front panel or remote control to select the highlighted character.
![]()
Deletes the last character selected.
![]()
Cancels the text entry process.
![]()
Submits the entered text.