USB AUDIO CONNECTION
The Edge A comes equipped with a USB Audio Input for connecting to a PC/Mac computer.
As the Edge A is Class 2 USB Audio Only, Windows-based PCs require a Cambridge Audio USB driver to be installed before connection, which can be found here. No extra drivers are required when using a Mac.
Important Note: Always turn the volume to minimum, switch to another input or turn the EDGE off before plugging/unplugging cables to the USB input or whilst booting up/shutting down your PC/Mac.
How to connect a Windows PC to the EDGE A via the USB audio input:
1. Install the appropriate Cambridge Audio Windows 2.0 USB driver on your computer. Please find a link to the most recent USB audio driver here.
The USB driver is required to ensure ASIO is installed, as this allows music player apps to have exclusive use of the peripheral, in addition to enable native DSD support.
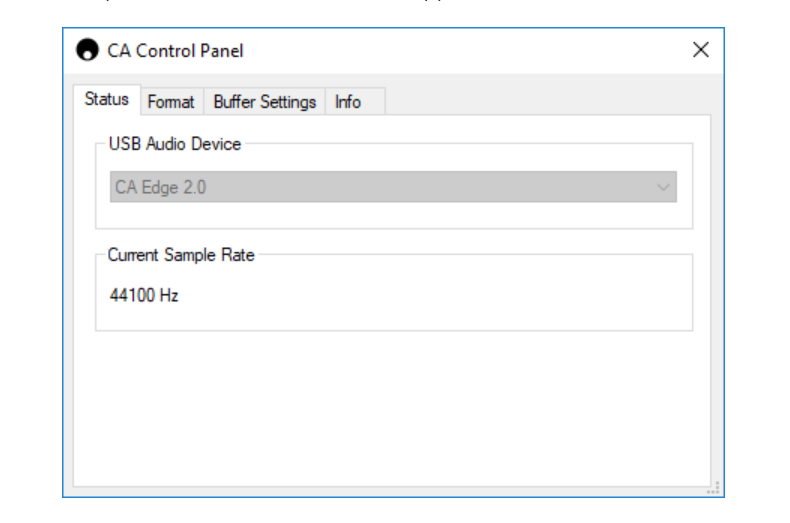
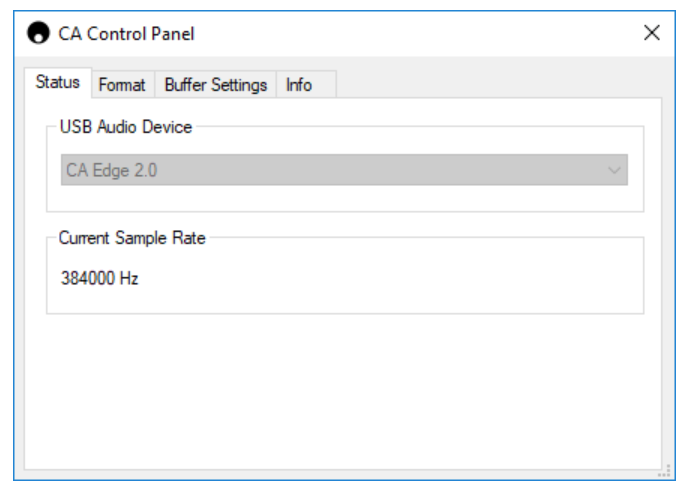
2. Once installed, you should notice the 'CA Control Panel' has been installed in your taskbar. This will show any connected Cambridge Audio USB Audio device.
3. Now run a USB Audio cable from the D5 input on your EDGE A to a free USB port on your computer.
4. Upon turning on your EDGE A, please select the D5 input. You should notice that the EDGE A appears as 'CA USB Audio' within the playback section of your computer’s Sound Settings (Control Panel > Sound > Playback).
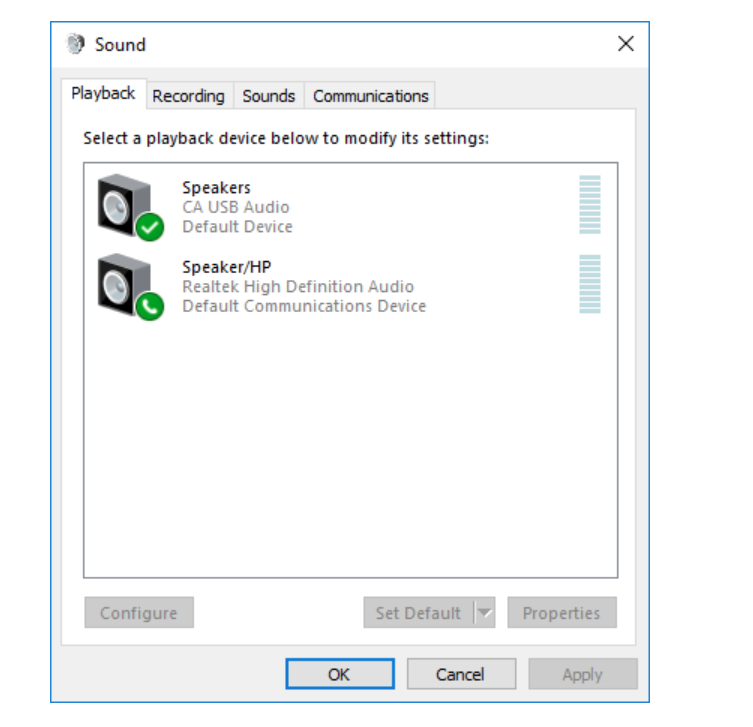
5. Make sure that the EDGE A is selected as your default playback Device with a green tick. Once completed the EDGE A should also appear in the CA Control Panel.
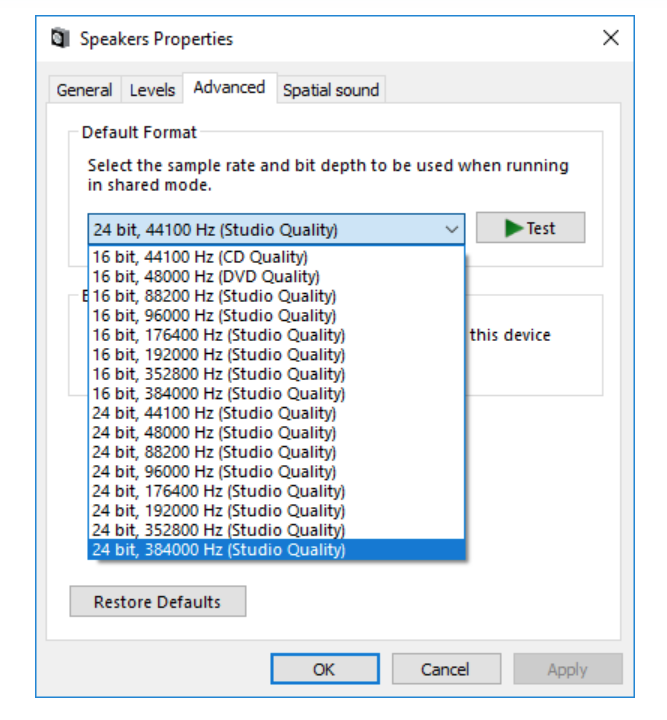
6. Next right click the EDGE A within playback devices and select properties. Here navigate to Advanced where you can select the sample rate and bit depth to be used. We would recommend selecting the highest available.
Note: This step is optional.
7. After doing this you will notice the 'Current Sample Rate' within the CA Control Panel should now change to reflect the settings you applied within the Advanced Speaker Properties.
How to connect a Mac to the EDGE A via the USB audio input:
If you are using an Apple Macbook you will not need to download or install any additional drivers before connecting.
1. Run a USB Audio cable from the D5 input on your EDGE A to a free USB port on your computer. Please be aware if you own a Macbook from 2016 or later you may need to purchase an additional USB-C adapter or a USB-C to USB-B cable.
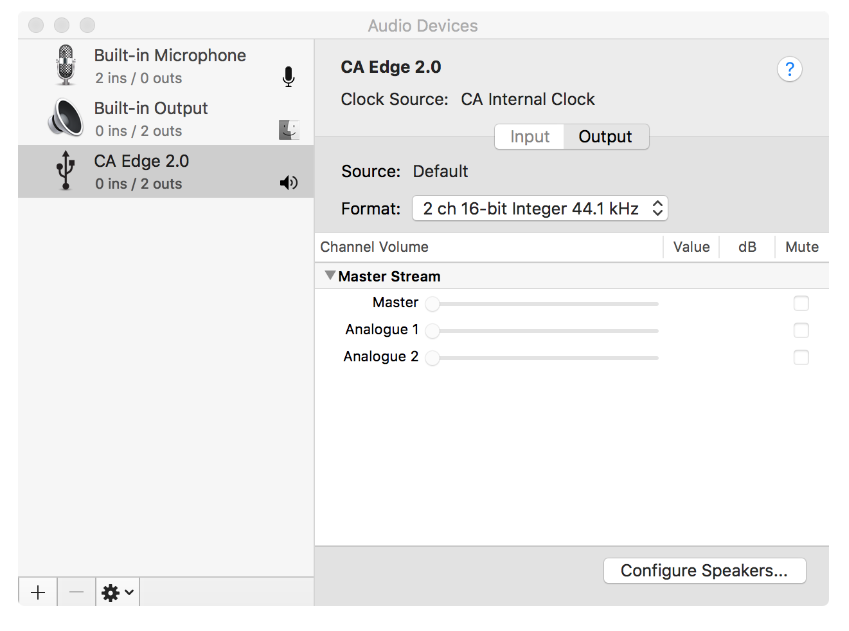
2. Upon turning on your EDGE A please select the D5 input. You should notice that the EDGE A appears as 'CA Edge 2.0' under Output within your Sound Settings (System Preferences > Sound> Output).
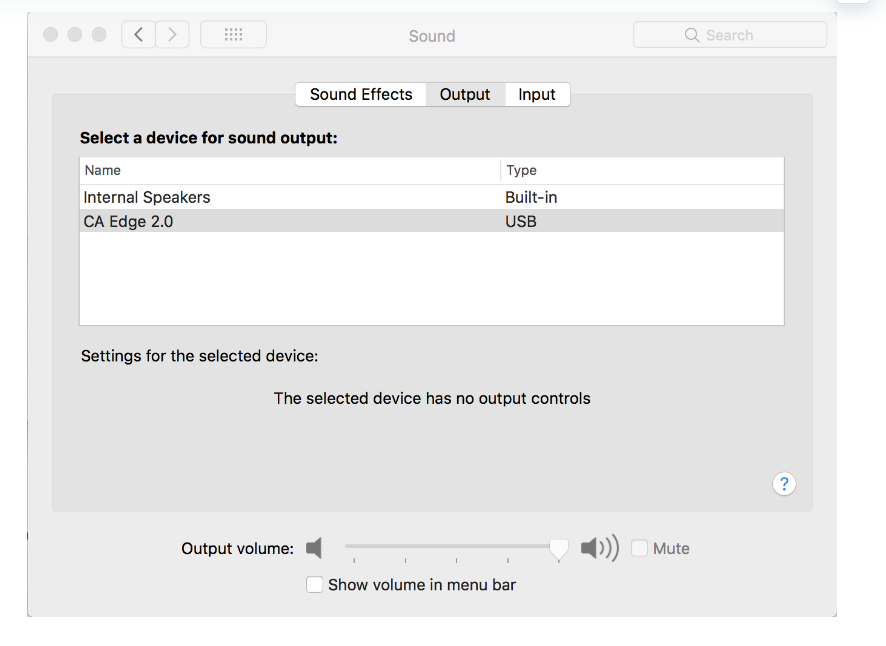
3. Make sure that the EDGE A is selected as the Output Device.
4. To achieve the best possible sound quality you will need to navigate to Audio MIDI Setup (Finder > Applications > Utilities > Audio MIDI Setup). Within 'Format' you will be able to select which sample rate and bit depth to use. We would recommend selecting the highest available.
Note: This step is optional.